Blog

  • How to Choose a Supported Gravel Tour: Finding the Right Adventure for Your Skills and Goals

    How to Choose a Supported Gravel Tour: Finding the Right Adventure for Your Skills and Goals

    How to Choose a Supported Gravel Tour: Finding the Right Adventure for Your Skills and Goals

    Gravel cycling has exploded in popularity over the past five years, and the options for supported gravel tours have expanded dramatically. But with that expansion comes choice—and choice creates confusion. Which tour matches your fitness level? Which destination appeals to your sense of adventure? How do you know if you are ready for a multi-day tour? How do you choose between a guided tour and a GPS-navigated independent experience?

    The decision is personal. It depends on your fitness, your experience, your budget, your schedule, and what you are seeking from a cycling holiday. But there is a framework you can use to think through the choice systematically. This guide walks you through that framework, using real Gravel Adventure tours as examples.

    First: Assess Your Fitness Level

    Fitness is the foundation. A supported gravel tour removes logistical stress—you do not have to worry about finding accommodation, carrying luggage, or planning routes. But it does not remove physical demand. You still need to ride your bike for 80–120 kilometres per day for consecutive days, often with significant elevation gain.

    Be honest about your current fitness. If you ride three times per week and your longest regular ride is 60 kilometres, you are not ready for an 11-day, 780-kilometre Pyrenees tour. You are probably ready for the Algarve (300–350 km over eight days, modest elevation) or Tuscany (450–600 km over eight days, significant but not extreme climbing). If you ride regularly and have completed several centuries or multi-day tours, the Pyrenees, Trans Alp, or South Africa become realistic targets.

  • Gravel Cycling in the Alps: A Guide to the Trans Alp Gravel Route

    Gravel Cycling in the Alps: A Guide to the Trans Alp Gravel Route

    Gravel Cycling in the Alps: A Guide to the Trans Alp Gravel Route

    The Alps are the iconic cycling destination in Europe. Riders dream of climbing famous passes, of descending into valleys, of moving through a landscape that shifts from rolling foothills through dense forests to high-altitude plateaus where the air is thin and the view endless. The Trans Alp Gravel route brings this classic cycling dream into the gravel world, crossing from one side of the Alps to the other on a network of gravel roads, dirt tracks, and minor paved roads that avoid the main highway corridors.

    This is an 8-day, 380–440 kilometre crossing. It is not the easiest gravel tour—the Alps demand respect, and the elevation is significant. But it is a tour built around the sheer drama and beauty of the Alpine landscape, where you experience the mountains as a true alpine crossing rather than as a series of peak-bagging climbs. The route moves through different Alpine regions—the Dolomites, the Stelvio area, the Garda region—each with its own character and challenges.

    Gravel Roads in the Alps: Finding the Quiet Routes

    The Alps are crisscrossed with dirt roads and gravel tracks maintained by forestry services, mountain farmers, and local authorities. Many of these routes existed for centuries before cars—they are droving roads, trade routes, access tracks to mountain pastures. Modern cyclists can ride these same routes, and in doing so, experience the Alps as they were travelled before paved highways.

    This has advantages and challenges. The roads are often quiet and beautiful, climbing steadily through meadows and forests toward high passes. But they are also rougher than the gravel roads found in lower regions. Loose stone is common on steeper sections. Some roads are technical. You need a gravel bike with good clearance, reliable brakes, and a rider with solid bike-handling skills. A rigid fork can work, but suspension helps significantly.

  • Gravel Cycling in Portugal’s Algarve: Riding the Coast and Countryside of Southern Portugal

    Gravel Cycling in Portugal’s Algarve: Riding the Coast and Countryside of Southern Portugal

    Gravel Cycling in Portugal’s Algarve: Riding the Coast and Countryside of Southern Portugal

    Portugal’s Algarve is often known as a beach destination, a place where tourists flock to lie on sand and drink wine in the sun. But the interior of the Algarve—the landscape beyond the coastal resorts—is a different world entirely. It is a landscape of rolling hills, dirt roads, cork forests, wildflowers (in spring), small villages where few tourists venture, and a quality of riding that rewards those willing to travel beyond the obvious.

    The Trans Algarve Gravel tour crosses this landscape from Tavira in the east to Sagres in the far southwest—a journey of 300–350 kilometres over eight days. It is not a high-altitude tour. Elevation gain is modest compared to the Pyrenees or even Tuscany. But it is a tour built around discovery, around moving through a landscape at bicycle speed, around villages and local hospitality, around roads that are quiet and beautiful.

    Why the Algarve for Gravel Cycling

    The Algarve makes sense for gravel cycling for several reasons. First, the roads. Portugal has maintained a network of dirt roads and gravel tracks through the interior that most tourists never see. These roads connect villages, follow river valleys, wind through cork forests, and climb modest hills with long, steady gradients. The road surface is generally good—packed earth and gravel, well-drained, rideable year-round.

    Second, the timing. October is near-perfect for cycling in the Algarve. Summer heat has faded, but the days are still long and warm. Rain is rare in early October. The landscape is still green from autumn rains, wildflowers are blooming in profusion, and the Mediterranean light is clean and clear. This is not summer chaos. It is a shoulder season where you have space and quiet.

  • Gravel Cycling in South Africa: Why the Cape Region Draws Riders Back

    Gravel Cycling in South Africa: Why the Cape Region Draws Riders Back

    Gravel Cycling in South Africa: Why the Cape Region Draws Riders Back

    South Africa’s Western Cape has become a magnet for serious gravel riders. The landscape, the roads, the quality of the experience—something about cycling through the Cape region creates a pull that brings riders back year after year. It is not the easiest destination. Heat, wind, and sometimes unpredictable weather demand respect. But there is something about riding through these landscapes that justifies the long flight and the investment of time.

    The Cape region offers gravel roads that wind through mountains, past vineyards, across high plateaus, and down into valleys where you can see for a hundred kilometres. The roads themselves are a mix of well-maintained gravel and rougher dirt tracks. Some days are technical and demanding. Others flow smoothly. The landscape shifts constantly—from Mediterranean scrubland to high-altitude desert to green valleys with rivers running through them.

    The Western Cape Landscape: Geography and Gravel

    The Western Cape is not a single uniform landscape. The region encompasses several distinct zones: the Winelands near Stellenbosch and Paarl, the Karoo plateau inland, the high mountain passes of the Du Toitskloof and the Franschhoek area, and the coastal regions around the Cape Peninsula. Each zone offers different terrain and different challenges.

    The Winelands are lush, with vineyards and farmland, gentler terrain and more shelter. But ride inland, and the landscape opens up. You climb into the Karoo—a vast, semi-arid plateau where temperatures soar, where wind can be fierce, and where the horizon seems to stretch forever. This is not gentle riding. This is exposure, space, and a landscape that does not coddle you.

    Gravel Roads and Road Conditions

    South African gravel roads are generally well-maintained by international standards. Many are packed gravel, smooth and fast. Others are rougher, more technical, with loose stone requiring careful line choice and good bike handling. Weather is the variable. Heavy rain can make roads briefly treacherous. Wind is a constant factor—the Cape is notoriously windy, and riding across exposed plateaus means you will face headwind at some point.

  • Training for a Multi-Day Gravel Tour: Building the Fitness You Need

    Training for a Multi-Day Gravel Tour: Building the Fitness You Need

    Training for a Multi-Day Gravel Tour: How to Prepare for Back-to-Back Days in the Saddle

    Training for a multi-day gravel tour is fundamentally different from training for a race, a century ride, or even a long weekend of riding. The demands are more sustained, the variables more numerous, and the rewards less obvious. You’re not chasing a time or a specific performance metric. You’re preparing your body and mind to perform well over many consecutive days, to handle fatigue accumulation, and to maintain engagement and enjoyment when the reality of the work becomes clear.

    Most experienced cyclists already know how to ride far. What they often haven’t trained for is riding far every single day, with limited recovery, across variable terrain, on gravel surfaces. That’s a different animal. It requires a different training approach, different physical adaptations, and a different mental calibration than anything you might have done on road bikes or in the controlled environment of weekend rides.

    Whether you’re preparing for a 450-kilometre tour in Tuscany or an 780-kilometre crossing of the Pyrenees, the training principles are the same. But the intensity and duration of specific elements shift dramatically. This guide walks through how to build the fitness that matters—not peak fitness, but sustainable fitness. Fitness that carries you through eight, 10, or 11 consecutive days without breaking down.

    The Specific Demands of Touring Fitness

    Tour fitness is distinct from race fitness in ways that matter. A race cyclist develops peak power, peak VO2 capacity, the ability to produce intensity on demand. A tour cyclist develops something different: the ability to sustain moderate effort repeatedly, to recover between days, to manage fatigue accumulation, and to maintain performance as workload accumulates.

    Race fitness often peaks and then declines because the demands are explosive and short-lived. Tour fitness needs to sustain because the demands are long-lived and cumulative. If you arrive at a tour with peak race fitness, you’ll have good first days and then suffer. If you arrive with solid tour fitness, you’ll pace yourself appropriately and likely finish stronger than you start.

    The specific demands include:

    Aerobic capacity: The foundation of tour cycling is the ability to sustain moderate aerobic effort—roughly 65–75% of maximum heart rate—for extended periods. This is a zone where you can maintain a conversation, where your body is burning fat efficiently, where you can repeat the effort day after day without cumulative damage.

    Muscular endurance: Beyond pure aerobic capacity, you need the muscular endurance to sustain power output over hours. Your legs need to be accustomed to working at moderate intensity for 6, 7, 8 hours without cramping or shutting down. This is developed through repetition, not intensity.

    Climbing capacity: Most multi-day gravel tours involve significant climbing. You need to be comfortable sustaining climbing efforts for 45 minutes to 90 minutes regularly. This isn’t sprinting up hills; it’s the ability to maintain a steady climbing pace while managing breathing and effort.

    Recovery between days: Your body’s ability to recover from substantial effort and perform again the next day is crucial. Some cyclists have natural recovery; others need to build it. This is trained by deliberately including back-to-back hard days in your preparation.

    Mental resilience: Tours have hard days. Days where conditions are difficult, where fatigue is real, where you question the decision to sign up. Mental resilience is the ability to work through these days and still perform well. This is built through experience and through deliberately putting yourself in situations where you’re mildly uncomfortable.

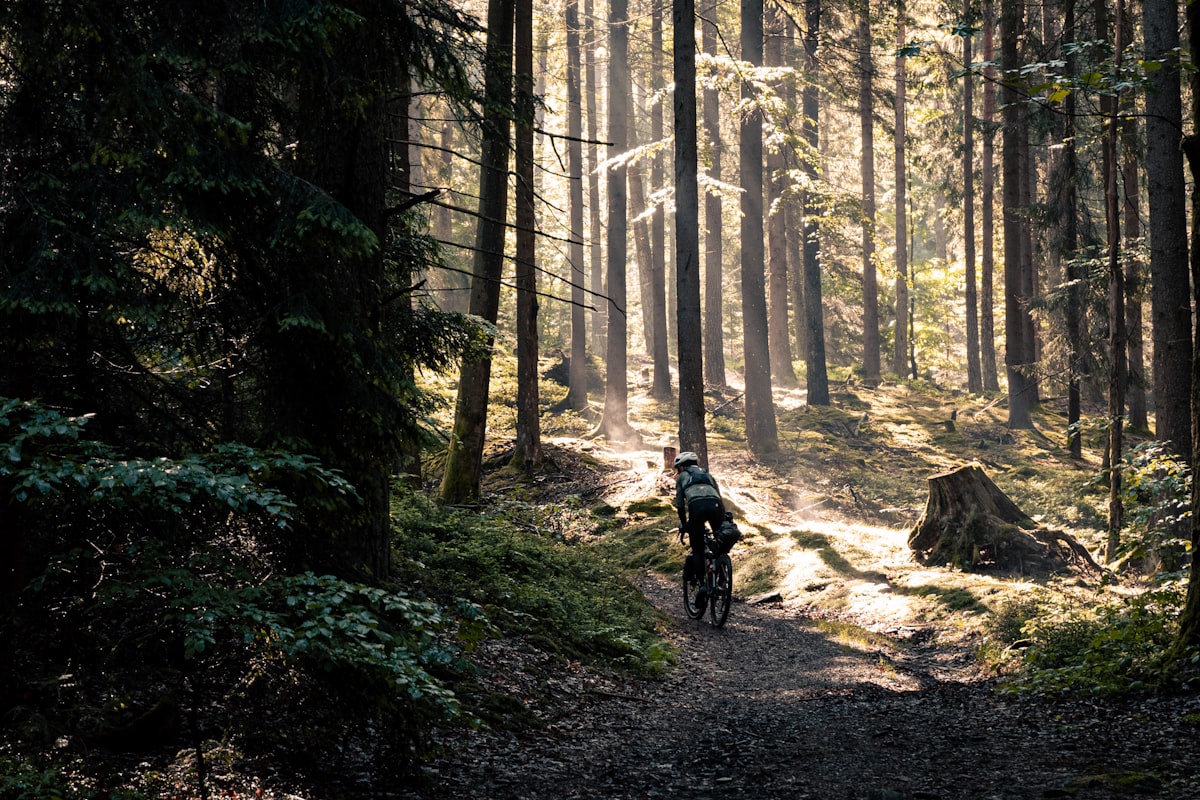
    Gravel-specific bike handling: Gravel requires different bike handling than road cycling. You need confidence on unpaved surfaces, comfort managing a bike on loose terrain, and the ability to descend on gravel without excessive caution. This is developed through practice, not through training zones.

    How Touring Fitness Differs from Race Fitness

    If you’ve trained for races—cyclocross events, gravel races, road races—you’ve developed a different kind of fitness than what a tour requires.

    Race fitness emphasizes peak power and the ability to sustain high intensity for specific durations (20 minutes, 90 minutes, 2–3 hours). You develop VO2 capacity, lactate threshold, short-duration power. These are all valuable, but they don’t directly translate to tour fitness. A racer can be dramatically more powerful than a tourer and still suffer on a multi-day tour because the efforts required are different.

    Tour fitness emphasizes sustainable power, recovery capacity, and fatigue management. You develop aerobic capacity to a high level, but you’re not developing peak power. You develop the ability to recover between efforts, but you’re not developing the ability to produce explosive efforts repeatedly. The zones you spend time in are lower intensity and longer duration.

    The practical difference: a racer might train with hard intervals (5 minutes hard, 2 minutes easy, repeat). A tourer trains with long steady efforts (2–4 hours at conversational pace, then a second ride the next day at the same pace). The racer develops sharpness; the tourer develops durability.

    If you’re primarily a racer transitioning to touring, the adjustment is significant. Your power will translate somewhat, but you’ll likely need 8–12 weeks of tour-specific training to feel confident. If you’re primarily a tourer doing a race, the adaptation is easier—you might struggle with the intensity, but the endurance base helps.

    Building Base Miles: The Foundation

    Base building is the first phase of tour training, and it’s not glamorous. It’s not high-intensity intervals or structured workouts. It’s simply riding consistently, at moderate intensity, building aerobic capacity and teaching your body to sustain effort.

    The goal during base building is consistency and volume, not intensity. You’re aiming for 6–8 hours of riding per week, distributed across 3–4 rides. Most of this should be at conversational pace—genuinely conversational, where you can speak full sentences without struggling for breath. This pace is typically 60–70% of maximum heart rate, in the zone where you’re burning primarily fat and training aerobic capacity.

    Base building takes 6–8 weeks and should be completed first, before you add intensity or structure. If you’re new to serious cycling training, base building might take 10–12 weeks. The goal is to build a foundation where 60–80 kilometre rides feel normal, not exceptional.

    During base building, one ride per week should be a longer ride—your “long ride.” This starts at perhaps 80 kilometres and gradually builds toward 110–120 kilometres. The pace should remain conversational; you’re not racing the long ride, you’re simply riding it.

    Base building is when you develop general fitness, learn how your body responds to sustained effort, and build the aerobic engine that everything else depends on. Don’t skip it. Even experienced cyclists need base building; it’s just usually shorter (4–6 weeks) if you’re already fit from other activities.

    The Consistency Requirement

    The most important factor in base building is consistency. Riding three times per week, every week, for 8 weeks is dramatically more effective than riding hard occasionally or riding sporadically. Your body adapts to repeated stimulus. The stimulus needs to be regular.

    If you miss two weeks of training during base building, you’ve essentially reset your progress. If you miss a week, accept that you’ve lost some fitness and potentially extend your base building by that week. Missing training is okay; sporadic training is ineffective.

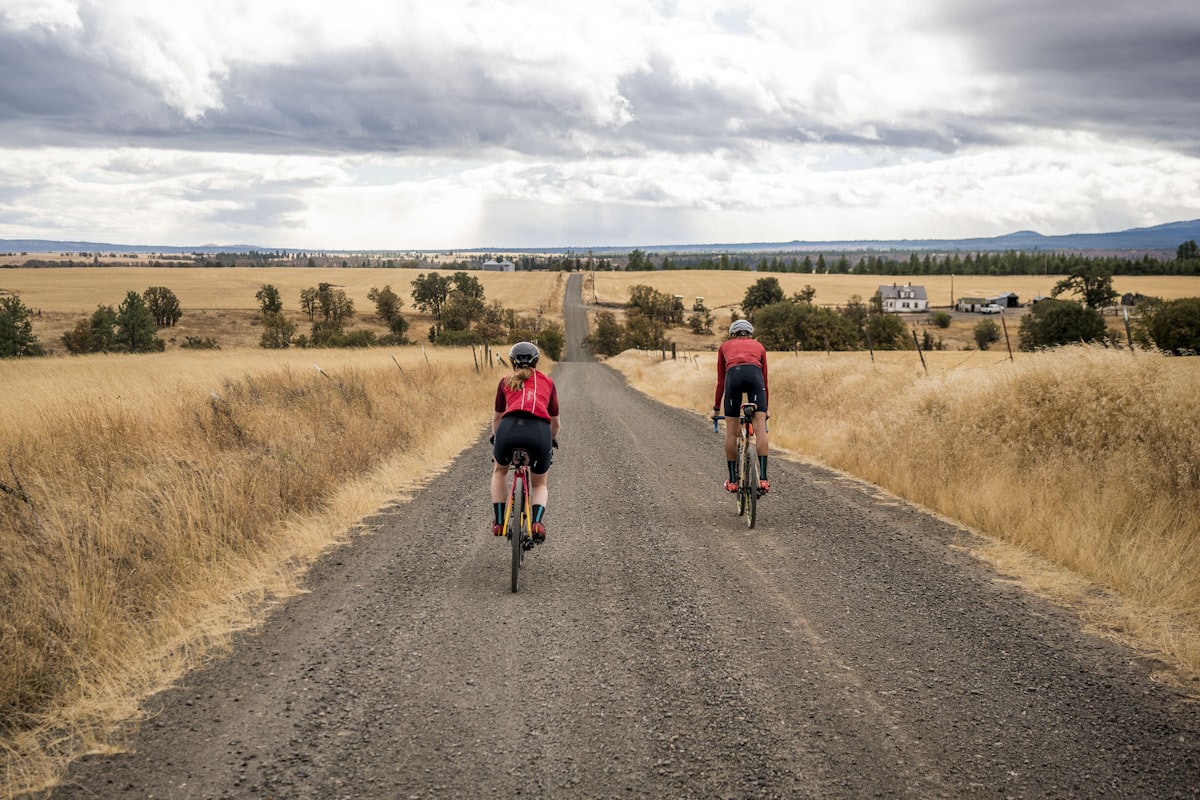
    Back-to-Back Training Days: The Tour-Specific Element

    Once you’ve built a solid aerobic base, the next crucial element is back-to-back training days. A tour involves riding hard (or moderately hard) every single day. Your body adapts to this differently than it adapts to single hard efforts. You need to practice it.

    Back-to-back training means riding significant distance two days in a row, then recovering, then repeating. This is distinct from racing, where you might have single hard days with recovery days in between. In touring, recovery days are rare or non-existent. Your body needs to learn how to perform on limited recovery.

    A practical back-to-back block might look like: Saturday 100 kilometres, Sunday 80 kilometres, Monday recovery ride 40 kilometres or rest, then repeat. The key is that both the Saturday and Sunday rides are at tour intensity (conversational pace, moderate effort), not at maximum effort. You’re not trying to go hard; you’re trying to go moderately hard while managing fatigue.

    Include 4–6 weeks of back-to-back training in your preparation. This should come after your base building phase, in the 4–6 weeks immediately before your tour. The goal is to teach your body how to recover, how to maintain performance across consecutive days, and how to manage the mental aspect of fatigue.

    Back-to-back training is where most of the tour-specific adaptations happen. Your body learns to clear lactate more efficiently, to maintain aerobic capacity despite fatigue, to recover enough between days to perform again. This is why it’s non-negotiable in your preparation.

    Nutrition During Back-to-Back Days

    Back-to-back training also teaches you about nutrition. After a 100-kilometre ride, you need to eat to recover. A light snack isn’t sufficient; you need actual food. Protein, carbohydrates, fats—real nutrition. Then you wake up the next day and do it again.

    This is where you experiment with what actually works for your body. Some cyclists need high-carb meals after riding; others need more protein. Some digest food quickly; others struggle if they eat too much. These are things you discover through back-to-back training, not through theory. By the time you arrive at your tour, you should know exactly what you need to eat to recover adequately.

    Climbing-Specific Training

    Most multi-day gravel tours involve climbing. Some tours (like Tuscany) involve very significant climbing. If climbing is a weakness, you need to address it specifically in your training.

    Climbing fitness is developed by climbing. There’s no substitute. You need to regularly ride hills, practicing the specific effort that climbing demands. The key is to focus on sustained climbing efforts (20–45 minutes at steady effort) rather than short, punchy climbs. Tour climbing is about sustaining effort, not producing peak power.

    If you live in flat terrain, climbing training is challenging. You might need to do hill repeats on whatever hills you have access to, even if they’re small. If you have access to better terrain, occasionally (every 2–3 weeks) do a longer, sustained climb at tour pace. The goal is to develop the muscular endurance and aerobic capacity to sustain climbing for extended periods.

    A climbing-specific session might look like: warm up 20 minutes, then climb steadily for 45 minutes at a pace where you’re working hard but can still maintain a steady effort, then descend and recover. Do this once per week or every 10 days, in the 6–8 weeks before your tour.

    If you’re particularly worried about climbing (if it’s a genuine weakness), consider doing a second, shorter climbing session per week. But avoid the trap of trying to go hard on climbs during tour training. Your goal is sustained effort, not peak power. Hard climbing efforts have a place in race training; they don’t have a place in tour training.

    Gravel Riding and Technical Skills

    If you’re transitioning to gravel cycling from road cycling, you need time to develop confidence on unpaved surfaces. This isn’t something you develop in the two weeks before your tour; it’s something you develop over months of riding.

    Start incorporating gravel into your base-building phase. If you have access to gravel routes, do your long rides on gravel. Do your recovery rides on gravel. Get comfortable managing a gravel bike in varied conditions. Ride in damp conditions, rough conditions, whatever you have access to locally.

    Specific technical skills to practice:

    Descending on gravel: Practice riding steep gravel descents at moderate speed. Learn how your bike and tires feel on loose surfaces. Develop confidence managing speed without excessive braking. This skill is developed through repetition, and it takes time.

    Climbing on gravel: Gravel climbing requires slightly different technique than road climbing. You need to find the line that offers the best traction, sometimes moving left or right to find a more solid surface. Practice this.

    Line selection: Reading terrain ahead and choosing the line that offers the best grip and the smoothest surface is a skill. Develop it through practice, not by thinking about it.

    Tire pressure management: Different gravel surfaces require different tire pressures. Learn what pressures work best for your bike and tires in various conditions. This is something you discover through experimentation, and it’s worth getting right before your tour.

    A 12-Week Training Plan Structure

    Here’s a rough structure for 12 weeks of tour-specific training. Adjust based on your starting fitness and specific tour demands.

    Weeks 1–6: Base Building

    Three rides per week: recovery ride (40–50 km), moderate ride (60–80 km), long ride (80–120 km, gradually building). All at conversational pace. Total volume: 6–7 hours per week. Include gravel riding where possible. Focus on consistency.

    Weeks 7–10: Back-to-Back Training

    Four rides per week: recovery ride (40–50 km), moderate ride (60–80 km), back-to-back rides Friday-Saturday or Saturday-Sunday (80–100 km each day). One climbing-specific session per week. Total volume: 7–9 hours per week. The back-to-back days are the focus; the other days support recovery and climbing development.

    Weeks 11–12: Taper and Focus

    Reduce volume slightly but maintain intensity. Do one back-to-back session in week 11 (80 + 70 km), then reduce volume in week 12 to allow for recovery and freshness. The goal is to arrive at your tour well-rested but not detrained.

    Flexibility in Planning

    This structure is a template, not a prescription. If you’re very fit already, you can compress the base building phase. If climbing is particularly challenging, you might add a second climbing session. If you have very limited access to gravel, you might extend your time on unpaved surfaces.

    The key principles remain consistent: build base fitness through volume and consistency, then develop back-to-back capacity through deliberate back-to-back training, then taper slightly to arrive fresh but trained.

    Managing Fatigue and Recovery

    Tour training is not about accumulating fatigue; it’s about managing it. You want to arrive at your tour fresh and trained, not accumulated-fatigue tired.

    Recovery happens through several mechanisms: sleep (priority: 7–9 hours per night if you’re training seriously), nutrition (eating appropriate amounts of protein, carbohydrates, and fat), and actual recovery days (easy riding or complete rest). Most amateur cyclists underestimate the importance of sleep and nutrition. They are the single biggest limiting factors in how much training you can handle.

    Include one complete rest day per week. Don’t ride at all. This isn’t laziness; it’s a requirement. Your body adapts during rest, not during training. Without genuine rest, you accumulate fatigue and increase injury risk.

    Include one easy/recovery day per week. This is a ride at very easy pace (50–55% maximum heart rate), typically 30–40 kilometres, where you’re just spinning and promoting recovery. The purpose is circulation and mental engagement, not fitness development.

    Monitor your resting heart rate. If your resting heart rate is elevated (5–10 bpm higher than usual), you’re likely underrecovered. Either reduce training volume or add an additional recovery day. Listening to your body’s signals prevents overtraining.

    Injury Prevention

    Tour training, particularly back-to-back training, increases injury risk. The most common injuries are overuse injuries: knee pain, lower back pain, neck strain. These develop from repeated stress without adequate recovery.

    Prevent them through: proper bike fit, strength training (particularly core and glute work), flexibility work, and genuine recovery. Spend 10–15 minutes twice per week on strength training. Focus on squats, lunges, planks, and glute bridges. These build the stability that prevents injury.

    If pain develops during training, address it immediately. A small knee twinge can become a major problem if ignored. Rest, assess, potentially see a professional. It’s far better to miss a week of training and heal than to push through and arrive at your tour injured.

    What Fitness Level Is Realistic?

    Different tours demand different fitness levels. Understanding what’s reasonable helps you set realistic expectations.

    For an 8-day tour with moderate climbing (Tuscany): You need to be able to ride 80–100 kilometres regularly, handle 1200–1500 metres of elevation gain daily, and sustain this for consecutive days. A base of 5–6 hours of riding per week, with some elevation included, is sufficient. 12 weeks of training is reasonable.

    For an 11-day tour with significant climbing (Trans Pyrenees): You need to be able to ride 100–120 kilometres regularly, handle 1400–1700 metres of elevation gain daily, and sustain this for nearly two weeks. A base of 7–8 hours of riding per week is necessary. 14–16 weeks of training is realistic.

    If you’re new to serious cycling: Expect to need 16–20 weeks of training. Your body is learning how to adapt to sustained training; everything takes longer.

    If you’re a experienced cyclist but new to gravel touring: 10–12 weeks is probably sufficient. Your fitness base transfers; you mainly need to develop gravel-specific confidence and back-to-back capacity.

    If you’ve done multi-day tours before: 10–12 weeks is enough, even if the tour is significantly harder than previous tours. Your body understands the demands; you’re building specific fitness for this specific tour.

    What Not to Do

    A few common mistakes in tour training:

    Don’t do hard intervals: Hour-long blocks of threshold training or VO2 intervals don’t develop tour fitness. They develop race fitness. Save hard intervals for racing. Tour training is fundamentally low-intensity and high-volume.

    Don’t skip back-to-back training: This is the single most important element. If time is limited, reduce long-ride distance but maintain back-to-back training. Back-to-back training is irreplaceable.

    Don’t train inconsistently: Sporadic training doesn’t work. Consistency is everything. Three rides per week, every week, for 12 weeks is dramatically more effective than six rides for 6 weeks.

    Don’t neglect recovery: Training is the stimulus; recovery is when adaptation happens. Sleep and nutrition matter as much as the riding. Treat recovery seriously.

    Don’t arrive at your tour fatigued: Taper appropriately in the final 2 weeks. Arrive fresh, trained, and ready. Arriving tired doesn’t help anything.

    Why This Matters

    Tour training is not about becoming a racer or chasing performance metrics. It’s about arriving at your tour prepared to enjoy the experience fully. A trained cyclist finishes each day with energy to explore, to eat well, to sleep well, and to wake up ready to ride again. An undertrained cyclist finishes each day exhausted, questioning decisions, and merely surviving.

    Training properly transforms the experience. It allows you to ride at a sustainable pace rather than struggling. It allows you to appreciate the landscape rather than just count down the kilometres. It allows you to engage with other riders, guides, and the places you’re passing through. This is why the training matters.

    The good news is that tour fitness is accessible to most serious cyclists. You don’t need to be a genetic outlier or a former professional. You need consistency, appropriate structure, and genuine commitment to recovery. These are within reach.

    Ready to Train and Ride?

    Whichever Gravel Adventure tour you choose, the training approach is the same: build a solid base, develop back-to-back capacity, practice the specific demands of your tour, and arrive fresh and trained. The structure in this guide works whether you’re targeting Tuscany, the Pyrenees, Cyprus, or Scotland.

    Start your training now if your tour is 12+ weeks away. Build consistently, add back-to-back training 6–8 weeks before your tour, then taper appropriately. By the time you arrive at your starting point—whether it’s a small coastal town or a Basque mountain city—you’ll be ready. Your legs will know what to do, your mind will be prepared, and you’ll be able to focus on the experience itself rather than just surviving it.

    The training is the foundation. Everything else—the scenery, the food, the other riders, the sense of accomplishment—is built on that foundation. Train properly, and the tour becomes everything it should be.

  • Cycling the Pyrenees on Gravel: A Guide to Trans Pyrenees Gravel

    Cycling the Pyrenees on Gravel: A Guide to Trans Pyrenees Gravel

    Cycling the Pyrenees on Gravel: A Guide to Trans Pyrenees Gravel

    The Pyrenees are not a secret. They’ve been attracting cyclists for a century, and the mountain pass culture that dominates the region—especially for road cyclists—is deeply embedded in European cycling lore. But the gravel version of the Pyrenees is something different. It’s quieter, more technical, more isolating. You’re not chasing the ghosts of Tour de France stages; you’re riding the roads that predate the famous climbs, the tracks that connect villages without the fanfare or the asphalt.

    Trans Pyrenees Gravel is an 11-day, 10-night journey from San Sebastián on Spain’s Atlantic coast to Roses on the Mediterranean, a span of roughly 780 kilometres. It’s broken into eight distinct stages, each with its own character and demands. This isn’t a supported weekend ride. This is nearly two weeks in the saddle, on gravel, at elevation, crossing some of Europe’s most dramatic topography. It’s also one of the most complete gravel experiences possible—the kind of tour that stays with you, not because it’s easy or famous, but because it’s genuinely substantial.

    The Pyrenees as a Gravel Destination

    The Pyrenees have never been primarily a gravel region in the way that, say, Tuscany has been. The mountains are too serious, the weather too unpredictable, the infrastructure too tied to the established road network. Which means that gravel cycling here is genuinely exploratory. You’re not riding a well-developed gravel tourism infrastructure. You’re riding old routes, shepherd’s tracks, forestry roads, and occasional sections where the traditional road network predates modern highway systems.

    What makes the Pyrenees special for gravel is isolation and scale. These mountains are big, they’re serious, and they’re significantly less crowded than the Alps. A single day’s ride might take you through villages few tourists ever see, along ridgelines where the only sound is wind and tyres on gravel, across passes where the topography is as important as the cycling. The surfaces vary wildly—from semi-maintained shepherd’s trails to high-altitude rocky descents where you’re practically hiking the bike.

    The Pyrenees don’t have the infrastructure mythology of Alpine cycling, but they have something perhaps more valuable: authenticity. You’re not riding on roads built to be famous. You’re riding roads that exist because they connect places where people actually live.

    Why Gravel in the Pyrenees Is Different

    Road cycling in the Pyrenees is about known passes and established routes. You know what you’re getting: the hairpins, the gradient, the scenery, the crowds. Gravel changes that equation fundamentally. The passes you’ll climb are less famous, less standardized, and significantly less crowded. Some are truly obscure—routes that appear on detailed maps but not in cycling guides, where you might see a handful of other riders (or none) across an entire day.

    The surfaces demand different skill. Road cycling requires managing speed, pacing, and group dynamics. Gravel requires you to read terrain constantly, manage traction and control, and trust your bike in conditions that aren’t predictable. The Pyrenees gravel adds weather variability to this—conditions can change rapidly at elevation, and the forecast isn’t always reliable. This creates a mindset shift. You’re not racing; you’re adapting.

    The isolation is also fundamentally different. On the famous road passes, you have other cyclists around you, villages nearby, escape routes if something goes wrong. On many of the gravel routes in the Pyrenees, you might not see another person for hours. This requires a different mental approach and also a different practical approach to self-sufficiency. You’re carrying more water, you’re managing nutrition differently, you’re thinking about weather as a serious variable rather than an inconvenience.

    The Journey: San Sebastián to Roses, Atlantic to Mediterranean

    The concept of Trans Pyrenees Gravel is elegantly simple: start on the Atlantic coast, finish on the Mediterranean. This creates a natural arc to the journey and gives each stage a geographic logic. You’re not just climbing and descending randomly; you’re moving systematically across a mountain range from ocean to ocean.

    San Sebastián is a significant starting point. It’s a proper city, a Basque cycling tradition centre, and the gateway to serious mountain riding. The city itself is beautiful—beaches, pintxo culture, architecture—but you’re here to ride. The first days push south and east into the foothills, building experience on the terrain before the truly serious climbing begins.

    The middle stages take you into the high Pyrenees. This is where the passes accumulate, where the gravel becomes more technical, where you start understanding the full scope of what you’ve committed to. Days might be 1400–1700 metres of climbing across 90–120 kilometres. The passes here are significant: some you’ve heard of (Passo d’Ordesa, various routes over the main divide), many you haven’t. The climbing is steady, the descent is often gravel, and the views are genuinely expansive.

    Toward the end, the route drops gradually toward the Mediterranean. The Catalan foothills are less dramatic but arguably more interesting riding—rolling terrain, good gravel, small villages, and the sense that you’re approaching somewhere rather than climbing somewhere. Roses, on the coast, is the finish. It’s warm, it has cafes and beaches, and you can actually understand why you spent 11 days moving through mountains to get there.

    The Eight Stages in Broad Strokes

    Stage 1: San Sebastián to the foothills. This is a warm-up day, establishing that you’re not on a road bike anymore. The terrain is rolling, the gravel is present but not overwhelming, and you’re getting used to the rhythm and pace.

    Stages 2–4: Into the mountains. These are the serious climbing stages. You’re gaining elevation quickly, the terrain is becoming more technical, and you’re entering true mountain riding. Each stage might exceed 1400 metres elevation gain. These are the days where your training matters and where you understand what you’ve trained for.

    Stages 5–6: The high Pyrenees and the main crossing. These are potentially the most technical stages. The passes are higher, the routes more exposed, and the gravel more variable. Weather becomes a serious consideration. These are also where the sense of achievement becomes palpable—you’re crossing a major mountain range on gravel.

    Stages 7–8: The descent to the Mediterranean. The climbing eases, the terrain becomes more rolling, and the destination approaches. There’s a psychological shift on these days—you’re no longer in the mountains but moving toward the coast, toward ease, toward the finish.

    The Physical Demands: A Major Mountain Tour

    Let’s be clear: Trans Pyrenees Gravel is significantly harder than a standard gravel tour. You’re not doing this at a casual pace. You’re spending 11 days riding substantial distances at elevation on varied surfaces. This requires preparation and fitness that’s noticeably more demanding than, say, a Tuscany tour.

    The daily distances typically range from 100–120 kilometres. The elevation gains are consistently high—most days exceed 1200 metres, with some reaching 1700 metres or more. That’s 11 consecutive days at a workload that would be moderate if it were only a weekend, but becomes genuinely taxing when accumulated.

    What this means practically is that you need to arrive prepared for sustained effort. If you’re used to weekend rides of 60–80 kilometres, this tour is a significant step up. You need to be comfortable riding 90+ kilometres regularly, and you need to have done multiple back-to-back days of riding to understand how your body adapts (or doesn’t) to consecutive days of substantial effort.

    The climbing demands are particularly important. The Pyrenees are serious mountains, and they don’t treat underprepared cyclists kindly. You’ll encounter sustained climbs of 45 minutes to 90 minutes at moderate effort levels. If you can’t comfortably sustain climbing for these durations, you’ll struggle with the middle stages. If climbing is a weakness, this tour isn’t a starting point; it’s a destination after you’ve built significant fitness.

    Fitness Demands vs. Experience

    This is worth distinguishing: fitness demands and technical experience demands are different things. The fitness demands are high. You need solid aerobic capacity, muscular endurance, and the ability to sustain moderate effort over extended periods. You probably need to be regularly riding 80+ kilometre weeks with some elevation included to be confident here.

    The technical demands are moderate. You don’t need to be a mountain biker or an expert bike handler. You need to be comfortable managing a gravel bike on varied surfaces, controlling speed on descents, and reading terrain ahead. These skills are easier to develop than fitness, and a year or two of regular gravel riding will prepare you technically.

    If you’re strong on your bike but haven’t done much gravel riding, you can manage. If you’re an experienced gravel cyclist but not particularly fit for climbs, you’ll struggle. The fitness baseline is the non-negotiable element.

    The Basque Country, Navarra, and the Catalan Coast

    Moving geographically through the Pyrenees means moving through distinct regions with their own character, and understanding these helps frame what you’re experiencing.

    The Basque Country (Euskadi) is the first serious region, and it shapes the early stages. The Basques have a distinctive cycling culture—this is where Indurain trained, where the cycling calendar is woven into social life, where people understand that cyclists are part of the landscape. The terrain is green and relatively lush, the villages are distinctive in their architecture and atmosphere, and there’s a sense that you’re riding in a place with serious cycling history.

    Navarra (Nafarroa) is the middle section, and it’s where you move from coastal foothills into genuine mountain terrain. The landscape shifts—it becomes drier, more open, the terrain more serious. Villages become smaller and more scattered. You’re moving from the Basque region into something that feels more isolated and remote.

    Catalonia appears toward the end, and the shift is subtle but real. The architecture changes, the language on signs changes, the food changes slightly, the landscape shifts toward the Mediterranean. By the final days, you’re in proper Catalan country, with the coast approaching and the mountains becoming a feature rather than a barrier.

    What this geographic progression gives you is a story arc to the tour that’s more than just “go from here to there.” You’re moving through distinct places, each with its own identity and character. The riding changes, the culture changes, and your experience deepens because you’re not static in one region but moving through a landscape that’s genuinely diverse.

    The High Passes and Technical Sections

    The Pyrenees gravel climbs are distinctive because they combine altitude, exposure, and technical surface variation. You might climb 1000 metres over a distance that looks short on the map, then discover the road is half-gravel, half-stone track, with a gradient that averages 8–10% and pitch sections exceeding 12%.

    Some passes you’ll encounter are proper mountain passes—established routes with history—but many are shepherd’s tracks or old roads that haven’t been repaved in decades. This means the surface quality can vary within a single climb. You might spend the first 800 metres on decent gravel, then encounter a section of loose rock and stone, then return to more manageable surface. Each transition requires adjustment.

    The descents from the high passes are where gravel shines and where technique matters. A technical descent on gravel requires you to commit to your line, brake less aggressively than you would on asphalt, and trust both your bike and your positioning. Some descents are smooth and flowy; others are rocky, technical, and demand constant attention. The good news is that on most well-tested routes, dangerous or sketchy sections are avoided. The point is to ride, not to hack through wilderness.

    Weather at elevation is a serious consideration. The Pyrenees can have dramatic weather swings—clear morning, afternoon storms, dropping temperatures at altitude. A descent that’s fine at 10 am might be genuinely sketchy at 3 pm if conditions deteriorate. This is why a supported tour with guides is valuable; they’re reading weather and route conditions, adjusting if necessary, and keeping an eye on the group’s wellbeing.

    What Being on the Road for Nearly Two Weeks Means

    11 days is a different psychological experience than 8 days. You move past novelty. The routine settles in. You stop being a tourist and start being someone who’s living, riding, and moving through a place.

    There’s a particular arc to multi-week touring. Days 1–3 feel new and exciting. Days 4–6 are where the routine establishes, where you understand the rhythm of waking, riding, eating, sleeping, and repeating. Days 7–9 are interesting because you’re no longer fatigued in a way that affects joy, but you’re also clear on exactly what you’ve committed to. And days 10–11 have a strange quality of their own—you know the tour is ending, and there’s a mix of anticipation, completion, and the sense that something significant is wrapping up.

    Being on the road for 11 days changes how you relate to your body, your bike, and the landscape. You develop an understanding of your performance patterns—when you’re naturally stronger, how weather affects you, how your body adapts (or doesn’t) to daily riding. You move through different mental states: confidence, doubt, fatigue, flow, and again. You understand, at a cellular level, what sustained effort feels like.

    Food becomes important in a different way. After 90 kilometres of climbing, you’re genuinely hungry—not gym-hungry or social-hungry, but actually depleted. The meals on a hotel-to-hotel tour take on significance because they’re fuel, recovery, and normalcy all at once.

    Recovery becomes real. Your legs adapt over the 11 days. Days 1–4 feel harder than days 8–10, not because the terrain changes but because your body adapts to the work. You’ll likely experience a day that feels significantly harder—a day where your body hasn’t recovered, or you didn’t sleep well, or conditions are particularly challenging. This is normal. It passes.

    Why It’s an Achievement

    Completing Trans Pyrenees Gravel is genuinely significant. You’ve ridden 780 kilometres. You’ve climbed multiple high passes. You’ve adapted to variable conditions, challenging terrain, and sustained effort over nearly two weeks. You’ve moved from one ocean to another under your own power, on gravel, with nothing but your bike and your fitness.

    This isn’t a casual accomplishment. It’s not easy, it’s not forgiving, and it’s not something you stumble through. You either prepare for it and execute it, or you struggle significantly. Which is part of why it matters. In an age where many cycling experiences are scaled to convenience, a tour that demands genuine preparation and sustained effort has value that’s separate from the scenery or the experience itself. You’ve proven to yourself that you can commit to something substantial and follow through.

    There’s also something about crossing mountains on gravel that feels more real than road cycling. A paved pass is engineered and controlled. A gravel pass is more wild, more variable, more genuinely in contact with the landscape. Finishing a gravel tour across the Pyrenees means something because the route isn’t guaranteed—it’s dependent on your fitness, your bike handling, your mental resilience, and your ability to adapt.

    Preparing for the Challenge

    If you’re considering Trans Pyrenees Gravel, preparation should span at least 12–16 weeks. This isn’t something you do casually.

    The foundation is aerobic capacity and muscular endurance. You need to be comfortable riding 80+ kilometres regularly, with multiple sessions per week at conversational pace. Your long ride should be in the 120–140 kilometre range before the tour, so that the daily distances feel challenging but not impossible.

    Climbing-specific work is important. You need to be comfortable sustaining climbing efforts for 45+ minutes regularly. If hills are a weakness, address this directly. Train on the steepest terrain you have access to, at a steady effort, for extended duration. The goal isn’t to develop explosive power; it’s to develop the ability to sustain climbing.

    Back-to-back riding is crucial. You need to know how your body adapts to consecutive hard days. Include at least 4–6 weeks of actual back-to-back riding in your training, even if the individual days aren’t maximally hard. Your body needs to learn how to recover and perform on consecutive days.

    Gravel-specific riding helps, though it’s not absolutely essential if your bike handling is solid. Ride gravel surfaces regularly, particularly steep gravel descents, so you’re confident on varied terrain.

    Finally, consider your mental approach. A tour like this is partly physical but also significantly mental. You’ll have moments of doubt, fatigue, and difficulty. You need to be mentally prepared to work through those moments. Many people find that experience and confidence from previous multi-day riding is valuable here.

    The Finish: Roses and the Mediterranean

    Finishing a tour like this is strange. You’ve spent 11 days riding, climbing, descending, eating, and sleeping. You’ve moved from the Atlantic to the Mediterranean, across mountains, through multiple regions. And then it ends. You’re in Roses, on a Mediterranean beach, and the mountains are behind you.

    There’s often a sense of anti-climax when a major tour finishes. You’ve been focused on something substantial for weeks (training) and then 11 days of execution. And then it’s done. You have a few days to process, to rest, to understand what you’ve accomplished.

    The reality sinks in slowly. You rode 780 kilometres. You climbed several thousand metres of elevation. You crossed a major mountain range on gravel. You spent 11 consecutive days in motion, on a bike, at significant effort. This is something you’ll carry with you—not as a badge or a brag, but as knowledge. Knowledge that you’re capable of sustained effort, that you can handle difficult terrain, that you can commit to something substantial and follow through.

    Ready to Cross?

    Gravel Adventure’s Trans Pyrenees tour brings experienced guides, route knowledge, and logistical support to an experience that could otherwise be overwhelming. The guides have tested these routes, they understand the terrain and the passes, and they’re familiar with the rhythm of multi-week touring. The support vehicle provides backup if mechanicals or fatigue become serious issues.

    If you’re an experienced cyclist with solid climbing fitness, if you’ve done multi-day tours before, if you’re ready for genuinely substantial riding, then Trans Pyrenees Gravel is an opportunity to do something few cyclists ever accomplish. Crossing the Pyrenees on gravel, from Atlantic to Mediterranean, over 11 days, at the edge of your fitness and capability. It’s not easy, it’s not casual, and it’s exactly that which makes it worth doing.

  • Gravel Cycling in Tuscany: Through the Apennines to the Heart of Italy

    Gravel Cycling in Tuscany: Through the Apennines to the Heart of Italy

    Gravel Cycling in Tuscany: Through the Apennines to the Heart of Italy

    There’s something about Tuscany that calls to cyclists. Perhaps it’s the light—golden and long in the afternoons—or the way the landscape rolls with a purpose, each valley flowing naturally into the next. Tuscany is not gentle. It’s a region built on hills, on the bones of ancient mountains. The Apennines cut across it like a spine. These are the roads that gravel cycling was made for: long gravel tracks climbing through forests, white roads (strade bianche) that have carried travellers for centuries, mountain passes that test your legs and reward your lungs, all woven together with the kind of scenery that makes you stop pedalling just to look.

    If you’ve spent the last few seasons riding in Denmark—flat, fast, reliable—Tuscany gravel offers something fundamentally different. This is climbing. This is riding through layers of landscape, where the surface changes beneath you constantly, where villages cling to hilltops and vineyards terrace the slopes. A hotel-to-hotel gravel cycling tour in Tuscany puts you in the heart of this landscape for eight days, with the logistics handled so you can simply ride, eat, and sleep in some of the most beautiful countryside in Europe.

    Why Tuscany Is a Destination for Gravel Cyclists

    Tuscany has become something of a pilgrimage for gravel cyclists over the last decade, but not because it’s fashionable. It’s because the riding here is genuinely excellent. Unlike some regions that marketed themselves as gravel destinations after the fact, Tuscany’s road and track network developed naturally over centuries. The white roads (strade bianche) aren’t new. They’re the bones of the regional road system—historically the main routes between towns before asphalt was laid. That means they’re purposeful, direct, and engineered well enough to have survived millennia of use.

    The terrain variety is another reason Tuscany stands out. A single day’s riding might include gravel climbs through chestnut forests, long white-road descents with views across multiple valleys, kilometres of packed earth tracks through vineyards, and technical rocky sections that demand attention. You’re not just riding from point A to point B; you’re moving through a landscape that shifts continuously—both geographically and tactilely.

    Then there’s the scale of it. The Apennine range runs like a backbone through Tuscany, and if you’re riding gravel in the region, you’re riding with the mountains as a constant presence. Some routes follow the ridgelines. Others climb toward them and then drop into the valleys beyond. This creates a particular rhythm to riding here: sustained climbing, expansive descents, the constant sense that you’re navigating by topography.

    The Surfaces and What to Expect

    Gravel in Tuscany comes in several distinct flavours, and understanding the differences helps you mentally prepare for the riding. The strade bianche are the most famous—unpaved roads with a distinctive white appearance from their compressed gravel and limestone surface. They’re usually rideable at speed, firmer than many gravel roads in Northern Europe, though rain can make them slippery. Most of the well-established routes use strade bianche as their backbone, often for long, flowing sections that trade off technique for pure distance.

    Beyond the famous white roads, you’ll encounter packed earth tracks through the vineyards of Chianti and Val d’Orcia. These vary in condition depending on the season and recent weather. In good conditions, they’re fast and smooth. After rain, they can be rutted and demanding. The upper sections—higher into the mountains—tend to be rockier, with more significant drainage channels cut into the surface. This is where riding technique matters. You need to pick your line, trust your positioning, and sometimes slow down enough to feel what the surface is doing.

    And then there are the climbs. Many of the longest climbs in Tuscany gravel tours are paved, or at least start paved before transitioning to gravel higher up. This is partly practical—villages cling to hilltops and have proper roads—and partly environmental. The switchbacks through densest forest are often paved for traction and erosion control. So expect a mix: some climbs will be pure gravel, others will be a blend of asphalt and gravel, with transitions that force you to adapt your mindset from smooth to technical.

    The Apennine Crossing and Mountain Passes

    The Apennines are old mountains, worn down by time and weather, but they’re still serious. A gravel tour through Tuscany will include multiple passes—some famous, some less known. Passes like Passo della Raticosa, Passo della Colla, and routes over the ridgelines between Tuscany and Emilia-Romagna, are significant climbs, typically 1200–1500 metres elevation gain in a single day of riding.

    What makes Apennine passes different from Alpine climbing is the landscape. You’re not climbing above the tree line. Instead, you’re climbing through forests of beech and chestnut, often in shade, with visibility limited to the next switchback or the section of track immediately ahead. The sense of progress is less obvious than climbing an Alpine pass, where you can see the distance gained. You know you’re climbing—your legs tell you—but the feedback is slower, quieter.

    The descents from these passes are where the gravel really shines. Long, winding gravel roads dropping 500–800 metres in elevation, with views opening up as you lose altitude and emerge from the forest. Riding these descents on gravel requires a different approach than road descending. You need to trust your bike, brake less aggressively, and let momentum carry you where it can. For experienced riders, these sections feel less like racing and more like flow state—the road twists, your arms manage small corrections, your eyes are always tracking ahead.

    The Landscape Rhythm: Days of Climbing, Valleys, and Vineyards

    One of the most rewarding aspects of riding in Tuscany is how the landscape teaches you to read terrain. You’re not riding an abstract route on a map; you’re following the contours and connections of a real region where humans have lived and worked for millennia.

    The climbing in Tuscany tends to be sustained rather than explosive. Days often start with a long, gradual rise—perhaps 500–700 metres of gain spread over 30–50 kilometres—which builds your legs but doesn’t destroy them if you’re pacing conservatively. These slower climbs have a meditative quality. You find your rhythm, settle into a cadence, and let the kilometres accumulate. Then comes a descent that gives your legs a break and lets you recover before the next climb. The day typically finishes at a village perched on a hilltop, where the day’s work is rewarded with a hotel, a shower, and food.

    The valleys between climbs are where you get to breathe and where Tuscany’s farming landscape becomes your cycling companion. Chianti, with its rows of Nebbiolo and Sangiovese vines, creates a landscape of colour and pattern. Later in the season, the vineyard terraces can look almost abstract from certain angles—parallel lines of green and brown stretching across the slope. Val d’Orcia, further south, has a different character entirely: broader valleys, warmer tones of earth, cypress trees marking the boundaries of estates. These aren’t just backdrops. They’re functional landscapes that influence the riding—the tracks between vineyards are often smooth and purposeful, connecting the farms in efficient lines that, fortunately, also happen to make excellent gravel routes.

    The white roads themselves become part of the experience. In clear light, they almost glow against the darker soil. In cloudy conditions, they fade into the landscape like old scars. Riding them is a process of discovery—each curve ahead could lead to a new vista, a hamlet you didn’t know existed, or a sudden drop into a valley you’d been climbing toward.

    Food, Wine, and the Culture of Cycling

    Tuscany is a region where food and cycling naturally intersect, though perhaps not in the romantic way guidebooks sometimes suggest. The reality is simpler and more grounded: you’ll be hungry after riding 80–100 kilometres through hills, and Tuscany has excellent food.

    The towns and villages where hotel-to-hotel tours base themselves are small, agricultural communities that haven’t been entirely transformed by tourism. The restaurants serve local food because it’s what they cook—wild boar ragu, bistecca alla fiorentina, ribollita, fresh pasta with seasonal vegetables. The wine is what grows in the surrounding hills. None of this is exotic or precious. It’s practical food, designed to fuel people who work physically, which is exactly what you need after a day in the saddle.

    What makes this part of the experience significant isn’t Instagram-worthiness. It’s the rhythm of the days. Breakfast before riding, lunch in a small town (often simple: a panini, some cheese, fruit), then riding to the evening destination where you shower, rest an hour, and sit down to a proper meal. The food becomes fuel rather than decoration, and the quality of that fuel—produced locally, seasonal—makes a noticeable difference in how you feel the following day.

    Cycling culture in Tuscany is present but quiet. The region has a road cycling heritage—the Giro d’Italia has passed through the Apennines many times. But gravel cycling is newer to Tuscany, more recent than the Italian cycling classics. This means the gravel routes exist but aren’t crowded, and the local understanding of what gravel cyclists need is less developed than in, say, Switzerland or California. Which, paradoxically, is part of the appeal. You’re discovering these routes rather than following a well-trod path, even if guides have been testing them for years.

    When to Ride: The Best Seasons

    Timing matters significantly in Tuscany. Spring (April–May) and autumn (September–October) are the classic seasons, and for good reasons. The temperature is moderate, the light is generous, and the gravel surfaces are typically in good condition.

    Spring arrives late in the Apennines. April can still bring unpredictable weather—rain showers that turn the white roads slippery, cool mornings that need a jacket for the first hour of riding. May is more settled. The light is long, with decent daylight until 8 pm. The air is clear, and the landscape is fresh. If you’re sensitive to heat, spring is preferable; the mountains and higher elevations keep temperatures honest.

    Autumn brings warmth but less consistently. September and early October are excellent—still warm, but typically drier than spring, with that quality of light that makes every landscape look painterly. Later October and November risk rain and the first signs of winter on the higher elevations. Some passes can get snow by late November, which is unusual but not unheard of.

    Summer (July–August) is generally too hot for sustained climbing if you’re not acclimated. The Apennines aren’t high enough to be cool at elevation, and the valleys can be genuinely hot. This is also peak tourist season, which affects accommodation and restaurant availability. Winter is possible but demanding—the higher passes can be snow-covered, and accommodation options thin out considerably.

    Weather and Gravel Conditions

    Gravel in Tuscany transitions dramatically with weather. The white roads are semi-paved and fairly stable in dry conditions, but rain turns them into something more technical and slippery. The packed earth sections through vineyards can become rutted after heavy rain. The highest passes can accumulate snow or ice if temperatures drop at elevation.

    This argues for autumn over spring in many years—autumn weather in Tuscany tends to be more stable, with less afternoon thunderstorm activity than spring. But autumn also means shorter days. You’re starting rides in lower light, and reaching your destination at dusk. Both have their appeals depending on your preference.

    The Physical Demands: Climbing, Duration, and Fitness

    A Tuscany gravel tour is not a casual week on easy terrain. You’re climbing consistently, often reaching daily elevations around 1200–1500 metres across 80–120 kilometres of mixed surface riding. This is serious work, and it requires preparation.

    The typical daily distance is 80–100 kilometres, with variants available depending on fitness and preference. The elevation gain tends to be front-loaded in many routes—the first few days tackle the biggest climbs, then later days often have slightly less elevation but might be longer in distance. This structure helps groups acclimatize to the terrain and build confidence before the harder mountain passes.

    What’s important to understand is that Tuscany gravel climbing is steady rather than explosive. There are few short, punchy climbs. Most climbs last 30–60 minutes of sustained effort. This means you need to be comfortable sustaining moderate effort for extended periods. If you can ride 90 minutes at a conversational pace on variable terrain in Denmark, you’re probably starting from a reasonable fitness base.

    The descent work, conversely, is about control and technique. You don’t need to be able to descend fast, but you do need to be comfortable controlling a bike on loose, sometimes rocky surfaces while managing speed over several kilometres. This is easier to develop through practice than pure climbing fitness.

    Building Specific Fitness for Tuscany

    If you’re planning a Tuscany tour and you know climbing is challenging for you, consider building a 8–10 week training block before the trip. Focus on:

    Sustained climbing: Ride hills of 20–45 minutes duration regularly, at a steady effort below your lactate threshold. The goal is to develop aerobic capacity and muscular endurance, not power. Spend time riding your steepest local climbs repeatedly if possible.

    Back-to-back days: The tour involves eight consecutive days of riding. Your body adapts to consecutive days differently than individual hard efforts. Include back-to-back riding in your preparation, even if each individual day isn’t particularly difficult.

    Varied terrain practice: If possible, ride gravel or unpaved surfaces regularly before the tour. This develops bike handling and helps you understand how your specific bike and tire combination behaves on loose surfaces.

    Low-level intensity: Most of your training should feel conversational. Tuscany climbing isn’t about intensity; it’s about duration and steady effort. Arriving with high VO2 power isn’t particularly helpful; arriving with rock-solid aerobic fitness is.

    The Hotel-to-Hotel Experience

    Hotel-to-hotel tours remove certain logistics friction from touring. Your accommodation is pre-booked, so each evening you know where you’re sleeping. Your luggage is transported, so you’re not carrying 15 kilos of gear. Your route is planned, tested, and marked. A support vehicle is tracking your progress and ready to assist if mechanicals or fatigue become problems.

    What this means practically is that you can focus on the riding and the experience without the overhead of route-finding, luggage management, or accommodation hunting. You can take a photo without worrying you’ll lose the light before reaching your destination. You can relax over dinner without scanning the map for the next day’s logistics.

    In Tuscany, hotel-to-hotel riding often means staying in 3- or 4-star hotels in small towns—not luxury but genuine comfort. Rooms are clean, showers are hot, and meals are prepared by people who cook for locals, not tourists. The breakfasts are European and straightforward. The dinners are serious meals, often with multiple courses. Wine is readily available, usually from the region you’re riding through.

    The social element depends on the group. Some hotels-to-hotel tours gather the whole group for dinner; others give you flexibility. You’ll meet the guides and the support crew daily. You’ll meet other riders. But you’re also free to have quiet evenings, to eat alone, to rest if you need to. The structure is there, but it’s not rigid.

    Beyond the Bike: What to Bring, How to Prepare

    Packing for a Tuscany gravel tour requires thinking through the variables: temperature swings (morning cool, afternoon warm), gravel surface conditions (clean vs. wet), and the reality that you’ll be riding in someone else’s landscape with their rules and norms.

    Bike setup matters. Tuscany isn’t technical terrain in the mountain-bike sense, but it’s variable enough that your tire choice, suspension settings (if applicable), and braking feel all affect how the days go. Wider gravel tires (45–50mm) are popular here because they roll well on the white roads while providing enough compliance for the rockier sections. The geometry of the landscape means you’re not locked into one ideal tire width; most good gravel setups perform reasonably across the range of surfaces you’ll encounter.

    Beyond equipment, think about mental preparation. Tuscany gravel cycling is a shift from cycling you might do at home. The climbing is more consistent, the surfaces less familiar, the landscape less controllable (weather, for instance). Arriving mentally ready to adapt rather than to execute a specific plan makes a significant difference in enjoyment.

    And consider your dietary needs. Italy has excellent food, but options can be limited in small villages. If you have specific preferences or restrictions, it’s worth communicating these in advance with your tour organizer.

    The Intangible Rewards

    What makes Tuscany gravel cycling memorable isn’t typically a single moment. It’s the accumulation of small things: the sound of your tires on the white roads, the light at golden hour, the rhythm of climbing and descending, the taste of the food, conversations with other riders about what you’ve all experienced, the strange calm of being fully present in one place for eight days without checking your email.

    It’s also the understanding that comes from moving through a landscape slowly. You don’t see Tuscany from a train window or a car; you see it kilometre by kilometre, climb by climb. You understand the geography in your legs and your lungs. You come to read the landscape—why the villages are where they are, why the tracks run the way they do, how the farming shapes the riding.

    For experienced riders, particularly those who’ve spent years on road bikes or even mountain bikes, a gravel tour in Tuscany offers something different. It’s not competition or training. It’s a way to ride that feels closer to exploration than athletics—which, if you’re in your fifties or sixties, might be exactly what you’re looking for.

    Ready to Ride?

    Gravel Adventure’s Tuscany tour is built on years of testing, route development, and understanding what makes these eight days work. The Apennines, the white roads, the vineyards, the climbs, and the descents have been chosen to create days that are challenging but achievable, scenic but not precious, and quintessentially Tuscan without being touristy.

    If you’re ready to experience gravel cycling at the level it was meant to be ridden—on real roads, through real landscapes, at a pace that lets you notice where you are—Tuscany is waiting. Bring your climbing fitness, your willingness to adapt to varied terrain, and your appetite for excellent food. Eight days of riding through the heart of Italy, one white road at a time.

  • What to Pack for a Multi-Day Gravel Tour: A Practical Guide

    What to Pack for a Multi-Day Gravel Tour: A Practical Guide

    What to Pack for a Multi-Day Gravel Tour: A Practical Guide

    Packing for a multi-day gravel tour is fundamentally different from packing for a camping trip or a self-supported tour where you carry everything. In a fully serviced setting, your luggage travels ahead in a support vehicle each day. You ride with minimal load, typically a small bag or jersey pockets. This changes everything about what you bring and how you think about gear.

    The philosophy is simple: bring what you actually need, not what you think might be useful. Your bike needs to be set up correctly. Your body needs appropriate kit for riding. Your luggage needs to contain what makes your evenings comfortable. Everything else is weight and complication. This guide walks you through what to pack for a multi-day gravel tour, what stays in your luggage versus what you carry, and what genuinely unnecessary items you should leave behind.

    The Fundamental Principle: Your Bike is Your Primary Gear

    Everything else is secondary. Your bike should arrive at the destination in the condition you’ll ride it. This means it should be mechanically sound, properly fitted, and set up for the terrain you’ll encounter. Too many cyclists focus on packing clothes and lose sight of the fact that bike setup is the most important variable for a multi-day tour.

    Before you pack anything else, verify your bike setup. Brakes should modulate smoothly and stop confidently. Drivetrain should shift crisply with no sluggishness or hesitation. Tyres should have appropriate pressure for the terrain—gravel requires lower pressure than road, typically 70–85 psi depending on tyre width and terrain. Chain should be clean and well-lubricated. Cables should be tight with no slack. If anything feels slightly off, have it serviced before you leave. A small mechanical niggle becomes a big problem after 50 kilometres of riding.

    Rim tape should be checked to ensure tubeless setup is sealed properly (if you’re running tubeless; many riders still use tubes, which is fine). Brake pads should have enough material to safely last the tour. If you’re at all uncertain, replace them. You don’t want to arrive at a tour with brakes that are marginal.

    Bike Transport

    Your bike will need to get to the tour start. Most cyclists either fly with their bike in a hard case or soft case, or they ship it ahead. If flying, a dedicated bike case (around €50–150) or a travel bag (€30–80) is standard. TSA rules and airline requirements vary, so check before you book. Most European airlines accept bikes as checked luggage if they’re properly packed.

    Basic packing: Remove pedals or fold them in. Turn handlebars parallel to frame. Release some air from tyres (they expand in the pressure changes of altitude). Use padding around the frame to prevent damage. Don’t overthink it—bike cases exist specifically for this. Thousands of bikes fly every week without issues.

    What You Carry on the Bike: Minimalism in Practice

    On a fully serviced tour, you carry minimal gear on the bike itself. A small bag or backpack (maybe 5–8 litres) is ideal. Some riders use a single jersey with rear pockets. Others use a small frame bag. The point is to keep it light and unobtrusive.

    What goes in your on-bike bag: One water bottle (you’ll refill frequently) or a hydration pack. Some riders prefer a 1-litre bottle or a 2-litre hydration bladder—either works. Food (probably 300–400 calories of something easily digestible—a bar, some nuts, maybe a sandwich). A small first aid kit (band-aids, antibiotic ointment, pain relief). A lightweight rain shell or packable jacket. Phone and keys. That’s genuinely it for most days.

    Tools and spares: A multi-tool (you’ll use it occasionally), a pump (essential), a spare tube, and a small pack of repair patches. Some riders prefer carrying two spare tubes if they’re particularly cautious. A chain lubricant is useful. That’s enough to handle 95% of mechanical issues without needing help from the support vehicle.

    Notice what’s absent: sunscreen, bug spray, a full first aid kit, snacks for every moment, a headlamp, a backup phone charger, a rain jacket for every scenario. These things live in your luggage. You’ll have them at the hotel, and that’s where they’re useful. Your job on the bike is to ride, not to carry every contingency.

    The Philosophy of Light Carrying

    Carrying minimal weight changes the experience fundamentally. You feel faster. Your knees hurt less. Your hands don’t fatigue from gripping the bars against extra weight. You’re simply riding the bike without the psychological burden of carrying a full load. This is one of the major advantages of a fully serviced tour—it lets you be a better cyclist because you’re not also being a pack mule.

    If you’re used to self-supported touring where you carry everything, this will feel shockingly light. The adjustment is mental more than anything else. You know the support vehicle has your gear. You know you can stop in a village and buy food rather than carefully rationing what you’re carrying. You can be present with the riding because you’re not worrying about load.

    Riding Kit: What You Actually Wear

    You’ll be wearing specific pieces of kit for eight consecutive days. Quality and comfort matter more than you might think. Most experienced riders have learned their preferences through years of riding. But if you’re building your kit for the first time, here are principles worth following.

    Shorts and Chamois

    Good shorts with a quality chamois are essential for comfort on consecutive long days. A marginal chamois feels fine for two hours and miserable after six. You want shorts that stay in place, that don’t chafe, and that have a chamois that supports your sit bones without being bulky. Budget €80–150 for decent shorts. Your body will thank you.

    You’ll have multiple pairs in your luggage, rotating through them. Having two or three quality pairs is better than one amazing pair. Chamois cream is useful for preventing irritation; many experienced riders use it as a matter of course on long tours. Bring it in your luggage and use it liberally.

    Jerseys and Tops

    A quality cycling jersey is better than a t-shirt. It’s cut for forward-leaning posture, has pockets in useful places, and the fabric works with sweat rather than absorbing it. You want something breathable and relatively quick-drying. Bring three jerseys in your luggage—you’ll wear one, have one drying from yesterday, and have a fresh one for tomorrow.

    A base layer is useful, particularly for early morning or cool evenings. Something lightweight and merino wool or synthetic (not cotton) is ideal. Cotton holds moisture and creates chafe; synthetic or merino dries faster and feels better against skin. You won’t wear a base layer while riding hard, but for morning rides in cool conditions, it’s valuable.

    Layering for Variable Weather

    This is crucial for tours in climates where weather is variable. A light, packable insulating layer (merino wool or synthetic fleece) provides warmth without bulk. It packs small and provides real warmth when needed—early mornings, high elevations, or cool evenings. You’ll keep it in your luggage and put it on as needed.

    A rain shell is essential. It doesn’t need to be premium or highly technical—any breathable, packable rain jacket works. You’ll keep it in your on-bike bag because weather can change. It’ll get wet and dry on the bike or in your luggage, and that’s fine. A good rain jacket costs €60–120 and will last years.

    The principle: dress in layers that you can add or remove without stopping. You’ll start cool, warm up during effort, cool down on descents, and manage with simple adjustments. Overdressing for fear of cold is as problematic as underdressing—you overheat, sweat, then cool down and feel miserable. Experienced riders dress lighter than they think they need to and adjust as they warm up.

    Shoes and Socks

    Cycling shoes that are broken in are important. New shoes on a multi-day tour are a risk. Your feet swell slightly over the days, and hotspots that were fine fresh become painful. Wear shoes you’ve ridden significant miles in and know are comfortable.

    You’ll also want shoes that work for off-bike activities—restaurants, hotels, walking around towns. A pair of sandals or casual shoes in your luggage is practical. Cycling shoes are fine for walking short distances, but for genuine comfort in the evening, having alternate footwear matters.

    Socks should be specific cycling socks (not cotton athletic socks or regular socks). Quality cycling socks have merino or synthetic blends that wick moisture, prevent blisters, and provide support. You’ll need four or five pairs in your luggage to rotate through. They compress small and are light enough that there’s no reason not to have enough.

    Gloves

    Cycling gloves are useful for all-weather riding and for hand protection if you crash. You don’t need fancy gloves—simple padded gloves work fine. Bring one pair that you can wear and wash as needed in your luggage. Most riders keep them on the bike or in their bag.

    Evening and Hotel Kit

    Once you arrive at the hotel each day, your focus shifts from riding to comfort and recovery. Your luggage contains everything you need for this phase of the day.

    Casual Clothes

    You’ll want comfortable clothes that aren’t cycling kit. Two or three casual outfits in your luggage—a pair of casual trousers or jeans, a couple of simple tops, something you can wear to dinner or explore the village. This doesn’t need to be fancy. Functionality and comfort matter more than fashion. Most cyclists on tours dress simply and no one cares or notices.

    Toiletries and Personal Care

    Hotels provide towels, but bring your own small quick-dry towel if you’re particular. Toiletries are personal, but basics worth noting: sunscreen (important in Mediterranean climates, less critical in Scotland but still useful). Lip balm with SPF. Insect repellent if you’re touring in areas with significant bugs. A good moisturiser (sun and wind dry skin). Tooth-related items. Basic medications you know you need.

    Chamois cream has already been mentioned, but it’s worth emphasizing: bring it. If you develop any irritation, cream prevents it from becoming a problem. Also useful: blister treatment. If you feel a blister starting, treating it immediately prevents it from becoming severe. A small blister kit lives in your luggage.

    Hair and hygiene items are personal. Most hotels provide basic soap and shampoo. If you have strong preferences, bring your own items. The space and weight costs are minimal.

    Medication and Supplements

    Bring any regular medications you take. Also useful: pain relief (ibuprofen or equivalent), allergy medication if you’re susceptible, and electrolyte supplements if you use them for recovery. Some riders bring magnesium or other recovery supplements. These are personal choices, but space is cheap so bring what supports your health.

    If you have conditions (diabetes, allergies, heart conditions), bring relevant medications and medical information. A small note with emergency contact information is prudent for any international travel.

    Documents and Practical Items

    Your passport or ID is essential (keep it accessible, not buried in luggage). Travel insurance documents should be accessible. A copy of your bike’s serial number is useful for insurance purposes (photograph your bike before you leave). Copies of hotel confirmation emails can be useful if questions arise, though the tour organizer typically has everything sorted.

    Phone charger (or appropriate power adapter for the country you’re visiting). At least one backup charger—they’re light and reliable phones are essential. A power bank is useful for extended days away from accommodation.

    Any specific documentation the tour requires—emergency contact forms, medical questionnaires. These are typically provided in advance.

    Money and Payment

    Most tours operate in areas where card payments work reliably, but carrying some cash is prudent. Small villages might only accept cash in shops. Bring enough euros (or relevant currency) for incidentals and tips. Your tour provider will clarify what’s included and what you’ll pay for separately.

    What NOT to Bring: The Unnecessary Weight

    This might be more important than what to bring. Experienced cyclists learn through painful repetition what they don’t actually need. Some classics worth mentioning.

    Multiple pairs of cycling shoes: One pair that’s broken in is sufficient. You’re not replacing shoes mid-tour; you’re wearing one pair.

    Multiple jackets: One rain shell works. You don’t need different jackets for different weather patterns. One good shell handles most scenarios.

    Backup bike parts: Unless you have a specific concern, you don’t need spare brake pads, spare derailleur cables, or spare spokes. The support vehicle carries basic repair supplies, and mechanical failure is genuinely rare on modern bikes.

    Electronic gadgets: You don’t need a camera beyond what your phone provides. You don’t need a secondary GPS device. Your phone is sufficient for navigation, photography, and communication.

    Books or reading material: A single paperback or e-reader is fine. Multiple books are weight for minimal gain. Honestly, after riding all day, most cyclists are happy to rest rather than read.

    Formal clothing: You don’t need a dress or suit for evening. Casual comfortable clothing is the standard for cycling tours. No one is dressing up; everyone is simply being comfortable.

    Full sports equipment: A yoga mat, resistance bands, or other training tools are not necessary. You’re getting plenty of physical activity from riding. Evening recovery is about rest, not more exercise.

    Packing Strategy: Luggage Organization

    How you organize your luggage matters for daily convenience and recovery. Most fully serviced tours provide guidance on luggage size and type. A single medium rolling suitcase or a large duffel bag is typical. Hard cases are fine but heavier. Soft luggage is more flexible and lighter.

    Organization tip: Keep items you need daily (toiletries, medications, casual clothes) easily accessible. Don’t compress everything so tightly that you can’t easily find things. A packing cube or similar compression bag helps organize and saves space.

    Your full riding kit and spares (extra jerseys, shorts, socks) should be accessible because they’ll need to dry and be rotated. Don’t pack them so tightly that they stay compressed and damp. Good airflow in luggage helps things dry between uses.

    The Day-to-Day Rotation

    In practice, your daily routine will be: Wake, put on clean shorts and jersey. Ride all day with minimal gear on the bike. Arrive at hotel, shower, change into casual evening clothes, put riding gear in the sun or in a laundry situation to dry. Sleep. Repeat.

    Most hotels will have laundry facilities or will do hand-washing for you. Your riding kit doesn’t need to be pristine—it gets dirty and sweaty and then gets washed. That’s normal. Don’t stress about cycling apparel being perfect; it’s meant to be used and washed repeatedly.

    Tips from Experienced Tourers

    Packing cubes are your friend. They compress clothing, organize by type, and let you find things without unpacking entirely. Spend €20 on a set and you’ll wonder how you ever traveled without them.

    Wear your heaviest/bulkiest items on the plane. If you’re flying with a gravel bike and need luggage space, wear your bulkiest shoes and heaviest jacket on the flight. This saves luggage space and reduces weight on the plane.

    Pack last-minute items in a separate bag. Toiletries you use the morning of travel, phone chargers, documents—keep these in a separate small bag that’s easily accessible. Don’t pack them in the main luggage where you’ll need to unpack entirely to access them.

    Bring a carabiner or small lock. Not for security in the paranoid sense, but for convenience. You can clip your small bag to your luggage, clip wet gear to something to dry, or secure items. A single carabiner weighs nothing and is surprisingly useful.

    Plastic bags are invaluable. Wet gear, dirty laundry, damp shoes—keep them separate from clean items. A few ziplock bags or grocery bags cost nothing and solve real problems.

    Bring a small sewing kit. Not a full kit, just needles, thread in a few colours, and maybe a button or two. It weighs nothing and you’ll be surprised how useful it is for minor repairs to clothing or gear.

    Pre-Tour Preparation: Testing Your Kit

    Before you commit to a specific jersey, shorts, or shoes on tour, wear them for significant rides and verify they work. A jersey that feels fine for 20 kilometres might chafe after 80 kilometres. Shorts that are comfortable for a weekend ride might be problematic after three consecutive days. You want to know these things in advance, not discover them on day three of an eight-day tour.

    If you’re buying new kit specifically for the tour, allow time for break-in and testing. Shoes in particular need real miles, not just wearing around the house. Most experienced cyclists say shoes need 50+ miles to truly settle before you commit them to serious touring.

    The Weight Question: Why It Matters

    You might wonder why so much emphasis on minimal weight when you’re not carrying it on the bike. The reason is psychological and practical. Packing minimally forces you to think about what actually matters. It prevents overpacking, which leads to luggage that’s cumbersome to move, to clothes you never wear, and to a general sense of excess. Minimalism in packing creates space for the actual experience of touring—the riding, the places, the people—rather than managing possessions.

    Additionally, minimal luggage means less to keep track of, less to worry about, and less cognitive load. You arrive at hotels, luggage is there, you get what you need, and move on. You don’t spend mental energy on items or logistics.

    Closing Thoughts: Let Experience Guide You

    These are general principles, but individual preferences vary. Some riders care more about comfort items than others. Some travel heavier, others lighter. You’ll develop your own preferences through experience. Your first tour might involve overpacking; by your second or third, you’ll know exactly what you need and what you can leave home.

    The core principle holds regardless: bring what you need for good riding and comfortable recovery. Leave the rest behind. Your bike should be your primary concern—everything else is support. Get those priorities right, and multi-day gravel tours become the remarkable experiences they’re meant to be.

  • Test title update

    Test title update

    Gravel Cycling in Scotland: A Guide to Riding the Highlands

    Scotland occupies a particular space in the cycling imagination. It’s both accessible—a flight or a ferry from Denmark—and genuinely remote. The Highlands are vast, mountainous, and sparse. Weather is unpredictable and often dramatic. The roads, including the gravel roads, follow routes carved through generations of practical use rather than modern planning. For the experienced gravel cyclist looking for something genuinely different from the Mediterranean sun and established cycling infrastructure of southern Europe, Scotland is revelatory.

    The concept of riding from the Atlantic to the North Sea appeals to something fundamental. You start on the wild west coast, pass through high mountain terrain, and emerge on the east side—a journey that has geographical and psychological logic. This isn’t a lap of familiar hills. It’s a crossing of genuinely significant terrain. Scotland Highlands Gravel runs in September, a window that captures late summer light and transitional autumn weather. This guide explores what makes the Highlands work for gravel cycling, what the riding is actually like, and what to expect when you commit to a week in one of Britain’s most wild landscapes.

    The Scottish Highlands: Geography and Character

    The Scottish Highlands cover roughly the northern two-thirds of mainland Scotland. They’re defined by mountains, glens (valleys), and a sparse population. Unlike the Alps or the Pyrenees, which are defined by elevation and technical climbing, the Highlands are defined by remoteness and vastness. Individual peaks might not be particularly high—Ben Nevis, the highest mountain in Scotland, is only 1,345 metres—but the terrain is severe, the weather is changeable, and the landscape is empty in a way that focuses your attention.

    The Highlands were shaped by ancient geology and dramatic weather. Valleys run deep, ridgelines are sharp, and water is everywhere—streams, lochs (lakes), and the constant presence of moisture. This landscape is not forgiving. It’s also genuinely beautiful in a way that bypasses aesthetics and lands in something more primal. The light at high latitudes (Scotland is at roughly 57°N) is particular and dramatic. In September, daylight is still long—dawn before 6 am, dusk after 8 pm—but with a quality of light that’s different from summer. Angles are lower, shadows deeper, and colour is more pronounced.

    Population in the Highlands is sparse. You can ride for hours and see only a few people. Villages exist, often at the heads of glens, but they’re genuinely small—places of a few hundred people where tourism is supplementary to actual livelihood. This emptiness is part of what makes Highland riding unique. You’re not passing through settled, managed landscapes. You’re passing through country that’s still defined by weather, elevation, and the presence of wildlife.

    Mountains Without Technical Climbing

    Here’s what’s important to understand about Highland climbing: it’s not technical. You won’t be dealing with Alpine hairpins or sustained, focused mountain passes. Instead, you’ll be riding through broad mountain terrain, often on passes that take hours to cross. A typical pass might involve 500–800 metres of elevation over 10–15 kilometres—steady, grinding climbing rather than steep intensity.

    What this means is that the challenge is endurance and consistency rather than power. Your ability to maintain effort for hours matters more than your ability to produce a high peak effort. If you can settle into a sustainable pace and hold it for a significant duration, you’ll cope with Highland riding. If your strength is short, intense efforts, you’ll find the grinding sustained climbs less suited to your natural riding style.

    Descents are equally non-technical. You’re not navigating through rock gardens or technical switchbacks. Instead, you’re descending into valleys via broad, gravel tracks that can be quite fast if conditions are dry. Wet conditions change this—loose gravel on steep descents demands attention—but the basic pattern is straightforward riding rather than technical complexity.

    Roads, Tracks, and Surfaces

    This is where Scottish Highlands cycling gets interesting. The surfaces you’ll encounter are varied in a way that’s quite different from Mediterranean gravel destinations. Scotland has been inhabited and crossed for thousands of years, and the infrastructure reflects this—ancient drove roads, military roads built by the British Army in the 18th century, old estate tracks, and modern gravel roads all coexist.

    A typical day will include: Sections of single-track road, most of which are narrow paved tarmac (one lane with passing places). Proper gravel roads in good condition—well-maintained, relatively smooth, and ride-able at a reasonable pace. More technical gravel and stone track that requires attention to line choice and tyre pressure. Sections of what looks like dirt road but is actually quite consolidated and ride-able. Occasionally, short sections of what could generously be called “rough track” where you’re essentially hike-a-biking or walking.

    The variation is constant. You might ride 10 kilometres of smooth gravel, then shift into single-track road for 8 kilometres, then encounter a technical track section that demands careful navigation. This mixture is actually ideal for gravel cycling—it’s interesting, never monotonous, and requires engagement without pushing you beyond reasonable bounds.

    What Scottish Gravel Actually Feels Like

    Scottish gravel is not Mediterranean limestone. It’s often mixed stone, sometimes quite coarse, sometimes with finer material binding it together. In dry conditions, it can be fast—good traction and predictable rolling resistance. In wet conditions, it becomes slippery and loose. This is important because weather is a factor in Scotland in a way it isn’t in southern Europe.

    The single-track roads deserve special attention. These are official public roads, but narrow—typically five to six metres from edge to edge. They usually have passing places every half-kilometre or so, where drivers can pull over to let opposing traffic through. On a bike, they’re fine. Traffic is minimal anyway. You ride down the middle when it suits you, pull over if a car approaches. It’s low-stress and becomes quite pleasant once you adjust to the rhythm.

    The technical track sections are real, but not extreme. You’ll encounter rough stone, ruts from vehicle traffic, sections that are quite loose, and places where water is running across the track. It’s manageable on a gravel bike, but it demands attention. Line choice matters. Tyre pressure matters (lower pressure for better traction, higher pressure for rolling speed—it’s a constant calibration). And you need to be willing to dismount occasionally if something is genuinely unrideable.

    Weather: The Variable Factor

    Here’s something to understand before you commit to Highland cycling: weather matters, and it changes. September in Scotland is genuinely unpredictable. You can experience four seasons in a single day. You might ride in sunshine in the morning, encounter rain in the afternoon, and have clear skies again by evening. Alternatively, you might wake to mist so thick you can’t see 30 metres ahead, and it might stay that way all day.

    This is not a complaint; it’s a reality. The Highlands get weather systems coming from the Atlantic, and mountains force that weather up, which means clouds, wind, and rain are genuine factors. But this variability is also part of what makes Highland cycling distinctive. You learn to be adaptable, to dress in layers, to manage wet conditions. And when the mist clears and sun breaks through, the landscape is revealed in a way that’s more dramatic precisely because the weather is changeable.

    September is a good month partly because you’re past the worst of summer rain (which is relatively rare anyway) and not yet into the full autumn storms of October and November. You should expect some rain, but you should also expect plenty of riding days with decent conditions. An eight-day tour is long enough that weather will vary—you won’t get eight perfect days, but you also won’t spend the whole tour wet.

    Wind and Exposure

    Wind in the Highlands is a real factor. You’re on high passes, often exposed terrain with little shelter. When wind is coming hard from the Atlantic, it can be tiring. But wind is directional; the route is planned with this in mind. Some days will feel windy, others won’t. It’s not like riding into a constant headwind for hours—weather systems move through, and the landscape provides some shelter in valleys.

    Exposure is real. If you have issues with heights or exposed terrain, some Highland sections will feel intense. You’re often riding on high passes with long views and drop-offs. But they’re not Alpine cliff-edge situations. They’re grassy, broad slopes with serious exposure but not extreme technical hazard. It’s worth knowing about yourself—if steep side slopes make you anxious, acknowledge it. It’s not a reason not to go, but it’s something to prepare mentally.

    The Landscape and What You’ll See

    Scottish landscape is distinctive. It lacks the lush green of southern England and the managed aesthetic of lowland farms. Instead, you see open moorland—mountains without trees, rolling expanses of heather and grass, and valleys with rivers and streams. Forests exist but are often plantations rather than natural woodland. What dominates is space and openness.

    The colour palette is muted—browns, greys, purples from heather, green grass, and the dramatic greys of rock. When sun comes through mist and illuminates the landscape, it’s stunning precisely because the light is rare and conditional. You understand landscape differently when weather is variable. On a bright Mediterranean day, the landscape is revealed all at once. In Scotland, it’s revealed progressively, conditionally, and the revelation feels earned.

    Wildlife exists but is mostly not immediately visible. You might see red deer on slopes (genuinely beautiful creatures), golden eagles if you’re lucky, and red squirrels. More likely, you’ll see tracks of animals but not the animals themselves. The wilderness is real without being aggressively obvious.

    The Villages and Places You’ll Pass Through

    Highland villages are genuine communities, not tourist decorations. You might pass through places with populations of 500–1,000 people where tourism is one strand among others. These villages often sit at the heads of glens, where geography naturally produces settlement. They have shops (small but functional), pubs (genuinely worth stopping in), and accommodations. You’ll stay in hotels in larger towns and smaller guesthouses in smaller places.

    Scottish hospitality is genuine. People are friendly and interested in why you’re there. Conversations happen in pubs over a drink. You’ll hear stories about local geography, history, and wildlife. There’s a sense of place in Highland communities that’s distinct from purely touristy destinations—you’re visitors, but you’re also welcome as people genuinely interested in the area.

    One thing to note: these are real communities with real infrastructure constraints. Shops have hours. Restaurants might not be open every day. This isn’t a complaint—it’s how places work when population is low. But it means you’re not in a zone of endless consumer choice. You eat what’s available, and that’s fine. It makes the experience feel more authentic.

    The Atlantic to North Sea Concept

    Scotland Highlands Gravel follows the concept of crossing from the Atlantic coast in the west to the North Sea coast in the east. This is more than a marketing concept—it’s a real geographical and psychological journey. You start on the wild western coast, pass through high mountain terrain, and emerge on a different coastline with different character.

    The western coast is dramatic and exposed. You might start in a place like Wester Ross, where mountains come down to sea and the Atlantic provides a constant weather source. The riding takes you inland, up through Highland valleys, and over high passes. By mid-week, you’re in high mountain terrain, far from any coast. Then the route descends eastward, gradually moving toward lower ground, and you emerge on the North Sea coast—a completely different environment, calmer, more populated in the relative sense, but still remote.

    This progression makes sense geographically. It’s not arbitrary. You’re essentially following the grain of the landscape, moving from one major watershed to another. It gives the tour a natural structure and logic—you’re not just riding in circles; you’re crossing something significant.

    Fitness and Pacing

    An eight-day Highland tour is a significant undertaking. You’re looking at daily distances typically between 50–80 kilometres, with elevation gain ranging from 600 metres on lighter days to 1,000+ metres on heavier days. Over the course of the week, you’ll climb 5,000–7,000 metres of cumulative elevation. It’s not superhuman, but it’s real work.

    The nature of the climbing is important. It’s not a single big effort each day; it’s sustained, grinding elevation over hours. This is why experience matters. If you’ve ridden century events or multi-day self-supported tours, you understand your body’s pacing and what sustainable effort feels like. If your experience is primarily shorter, faster rides, you might find the sustained nature of Highland cycling challenging initially.

    That said, the pacing is designed to be manageable for experienced amateurs. You’re not racing. You’re not trying to set speed records. You’re moving through landscape at a speed that lets you engage with it. On a good day, you might ride at a conversational pace for hours. On a harder day with significant elevation, you’ll work harder but still sustainably.

    Training for Highland Cycling

    Preparation should focus on consistent, sustained riding. Efforts of 4–6 hours at moderate intensity are more relevant than short, intense intervals. Riding on varied terrain helps—if you have access to gravel or rough roads, use them. Hill work is important, but more valuable is learning to pace sustained climbing rather than attacking it hard.

    Mental preparation is equally important. Highland cycling requires adaptability and acceptance of variability. If you need perfect conditions and guaranteed comfort, this might not be the ride for you. If you’re okay with weather, with physical effort, with genuine wilderness, then you’re well-positioned to enjoy it deeply.

    Why Danish Gravel Cyclists Love Scotland

    For cyclists from northern Europe—particularly from relatively flat, managed landscapes—the Highlands offer genuine wildness. Scotland is accessible (short flight, English language, familiar culture) but feels genuinely remote. You’re not in a tamed cycling destination; you’re in country that’s still defined by landscape and weather rather than tourism.

    There’s also something about the light and the landscape that resonates with northern European sensibilities. The palette is not dissimilar to Scandinavian landscapes—moorland, mountains, sparse vegetation. But it’s more dramatic, more extreme in its emptiness and scale. For experienced cyclists, this rawness is appealing precisely because it demands something from you—adaptation, acceptance, engagement.

    And then there’s the simple fact: riding across the Highlands is genuinely interesting. The terrain varies enough to keep you engaged. The routes have logic and flow. The weather creates drama and story—it’s not a perfectly controlled experience. When you finish a week of Highland cycling, you haven’t just completed a tour; you’ve done something that required actual adaptation and effort.

    Practical Considerations

    Getting to the Scottish Highlands from Denmark involves a flight to Glasgow or Edinburgh (typically 3–4 hours from Copenhagen, often with one connection) and then transfer to the Highlands. This is more complex than reaching Cyprus, but not dramatically so. You’ll arrive tired but can usually rest a day before the tour starts, allowing for bike setup and acclimatisation.

    Bring your bike, obviously. Scotland is on the left side of the road, which is just something to accept. Everyone does. Traffic is minimal anyway, particularly once you’re on gravel roads. Phone coverage is generally fine even in remote areas, though there are patches of no signal—again, just something to accept.

    Accommodation is arranged as part of the fully serviced tour. Hotels and guesthouses are comfortable; they’re not luxury, but they’re good. Food is straightforward British/Scottish—meat, vegetables, potatoes. Whisky is excellent if that’s your thing. Coffee is better than it used to be. You won’t eat badly, though the cuisine is more functional than refined.

    Gear and Bike Setup

    Your bike should be set up for mixed terrain. Tyres should be robust and capable of handling both smooth gravel and rougher track—something like 45–50mm gravel-specific tyres works well. If you’re running wider tyres, that’s fine too; clearance on a gravel bike usually allows 50mm+ without issues. Lower pressure than you’d run on pure road (maybe 70–80 psi) gives you better traction and comfort on rough surfaces.

    Mechanically, your bike should be dialed in before you leave Denmark. Brakes should modulate well and feel confident. Drivetrain should shift crisply. Cables might stretch during a tour; any existing looseness will get worse. It’s worth having everything checked by a mechanic before you go.

    You’ll carry a small toolkit: pump, spare tube, multi-tool, chain lubricant, and maybe a small first aid kit. Mechanical failures are rare, but they happen. Flats are the most likely issue, so being able to fix a tube is important. The support vehicle can help with major problems, but self-sufficiency is valuable.

    Clothing and Weather Management

    This is important: dress in layers. You’ll wake to cool, potentially wet conditions, start riding, warm up, potentially encounter rain, then cool down again by evening. Having layers lets you manage this. A light, packable rain shell is essential. Shorts with good chamois are important since you’re sitting for hours. A jersey is better than a shirt because of the pockets and the fit. Shoes that work for walking are valuable because you’ll walk occasionally, both off-bike and through villages.

    September weather in Scotland requires thinking about temperature variation. Morning temperatures might be 8–10°C; afternoon could be 18–20°C. Wind can make conditions feel cooler. Rain can be a short shower or extended. Preparing for this variability is key. Once you’re riding and generating heat, you’ll shed layers. At rest, you’ll want them.

    What Fully Serviced Means in the Scottish Context

    Fully serviced in the Highlands is particularly valuable because logistics are complex. Accommodation is arranged in advance—guesthouses and small hotels chosen for their location and quality. Luggage transport means you ride with minimal load, which is important for consistency across eight days in variable terrain. The support vehicle is particularly useful in Scotland because weather and terrain are unpredictable. It’s reassuring to know help is available if weather becomes difficult or if you’re simply struggling with the day’s effort.

    Daily briefings provide maps, route suggestions, and local information. You’re not locked into a specific path, but you have structure. In a landscape as vast as the Highlands, having suggested routes and information about terrain is valuable. It lets you make informed choices about pace and routing rather than guessing.

    The combination of support infrastructure and landscape freedom is unique. You have enough structure to feel secure, but enough freedom to explore and adapt. This is the sweet spot for serious amateur cycling.

    Closing Thoughts

    The Scottish Highlands are not everyone’s cycling destination. They don’t offer the consistency of Mediterranean climates, the established infrastructure of Alpine regions, or the ease of flat, familiar touring. What they offer instead is genuine wilderness, varied terrain, dramatic landscape, and the satisfaction of crossing something significant on a gravel bike.

    For the experienced gravel cyclist looking for something distinctive—something that demands adaptation and offers real reward—the Highlands are remarkable. You’ll ride in weather, over terrain that varies constantly, through landscapes that are genuinely wild. You’ll understand why these mountains shaped history and why they continue to define Scottish identity. And when you finish, you’ll have a story worth telling and a week you won’t forget.

    If you’re ready for gravel cycling that’s real, rewarding, and genuinely different, Scotland Highlands Gravel deserves serious consideration. The Atlantic is waiting. The mountains are there. The roads are ready.

  • Gravel Cycling in Cyprus: A Route Guide to Trans Cyprus Gravel

    Gravel Cycling in Cyprus: A Route Guide to Trans Cyprus Gravel

    Cyprus holds an unexpected place on the gravel cyclist’s mental map. It sits at the edge of Europe, in the eastern Mediterranean, and offers something that becomes rarer the more you travel: truly varied terrain in a compact, manageable space. The island is small enough that you can cross it in eight days on a gravel bike, yet complex enough that each day feels distinct. The roads are a mix of old tarmac, proper gravel, and limestone tracks that have existed for centuries. The light is relentless and the landscape shifts from coastal flatness to mountain altitude within a few hours of riding.

    For the experienced gravel cyclist in search of a spring escape, Cyprus works particularly well. It’s accessible from most European cities, the riding season is predictable, and the challenge is real without being overwrought. This guide walks you through what makes Trans Cyprus Gravel worth your time — a tour designed and operated by Gravel-Adventure, an experienced tour operator specialising in fully serviced gravel cycling holidays across Europe and South Africa.

    300–375
    km total
    8
    days riding
    1,952
    m highest point
    April
    ideal season

    Destination

    Why Cyprus?

    Cyprus is an island nation about 225 kilometres long and 100 kilometres wide — roughly the size of Corsica. It lies south of Turkey and west of Syria, at 34°N, which gives you a sense of its climate context. For most of the year, the island is warm and dry. It’s also surprisingly mountainous. The Troodos Mountains run down its spine, with the highest peak, Mount Olympus, reaching 1,952 metres. These mountains are not high in Alpine terms, but they are real elevation, and they will demand effort on a bike.

    The island has been continuously settled and occupied for thousands of years, which means the landscape is layered with human activity — villages that have existed for centuries, old trade routes, paths used by shepherds, and medieval remains. This history is visible in the roads and tracks you’ll be riding. There are no wild, untouched stretches of gravel here; instead, the gravel is the bones of old infrastructure, the connective tissue that linked communities long before modern highways.

    The gravel is the bones of old infrastructure — the connective tissue that linked communities long before modern highways. You follow paths that meant something to people who lived there.

    For gravel cycling, this matters. It means the routes flow naturally through the landscape rather than feeling imposed upon it. You’re following paths that made sense to people who lived there, rather than new tracks cut for recreational purposes. That sense of authenticity, of riding routes that meant something historically, gives Cyprus a distinct character among Mediterranean cycling destinations.

    The Climate: Spring and Autumn are Everything

    Cyprus has an intensely Mediterranean climate. Summer is hot and dry — daytime temperatures regularly exceed 35°C, and the sun is fierce. Winter is mild by northern European standards, but rain is real, and mountain passes can be cloudy and cool. The sweet spot for gravel cycling is spring (March through May) and autumn (September through November).

    Trans Cyprus Gravel runs in April, which is ideal. Spring temperatures are moderate — typically 18–25°C at sea level, cooler in the mountains. The landscape is still green from winter rains, wildflowers are abundant, and the days are long enough to give you a comfortable riding window.

    The quality of light in April is exceptional. You get colour and definition without the harsh, bleaching intensity of summer. Early morning light on the Troodos Mountains has a peculiar clarity — you can see vast distances, and the landscape reads clearly as you ride through it. After weeks of northern grey, it’s quietly rejuvenating.

    Climate
    18–25°C in April

    Spring temperatures at sea level — cooler in the mountains. Long daylight and consistent weather.

    Landscape
    Wildflowers & cedar

    Troodos forests still green from winter rains. Roadside bloom and clear alpine views from the passes.

    History
    Centuries of paths

    Old shepherd tracks, monastery roads, and medieval trade routes — gravel cycling with real depth.

    Terrain

    The Troodos Mountains and Gravel Terrain

    The Troodos Mountains are the heart of gravel cycling in Cyprus. They run from the western part of the island to the south-central region, and they’re the reason a gravel bike works so well here. The roads up, around, and through them are a patchwork of surfaces: some sections are paved tarmac, but substantial portions are unpaved — gravel roads, limestone tracks, and what the locals call “dirt roads” that are actually pretty well-consolidated.

    These aren’t the boulder-strewn single tracks of Scotland. They’re not the technical rock gardens of alpine passes. Instead, they’re roads that have been shaped by centuries of use, weather, and practical maintenance. The gravel is typically rounded limestone, comfortable to ride on if you have reasonable tyre volume — something like 40–50mm works well.

    What makes the Troodos attractive is that you can gain elevation quickly without huge commitments. Climbs of 400–600 metres in 8–12 kilometres are normal. They’re steep enough to feel like real climbing, but not so sustained that a moderate pace doesn’t work. The village of Platres sits at 1,410 metres, and the roads around it are almost entirely unpaved.

    Surface Variation: What You’ll Actually Ride

    Across a typical day on Trans Cyprus, you’ll move through most of these surface types. The variation is one of the strengths — it means you’re never doing the same thing for hours.

    Tarmac — ~30–40% of total distance
    Good gravel — Wide, consolidated, fast riding
    Rougher gravel — More attention needed, rewarding
    Limestone tracks — Ancient paths, well-compacted
    Gravel cycling in the Troodos Mountains, Cyprus
    Cedar & pine — the high roads of the Troodos at altitude

    Route

    The Trans Cyprus Route: Larnaca to Paphos

    Trans Cyprus runs from Larnaca, on the east coast, to Paphos, on the west coast. The total distance is typically 300–375 kilometres over eight days, depending on routing choices. This isn’t a race-pace schedule; it’s built for enjoyment, exploration, and recovering from the sensations of the previous day. You’re covering meaningful distance without burning out.

    Larnaca is a workable starting point. It has an international airport, so you can fly in from Copenhagen with your bike and be on the road within a few hours. From there, the route moves inland and begins climbing toward the Troodos Mountains. Over the first few days, you’re gaining elevation and moving into the mountainous interior.

    The middle section takes you through and around the Troodos Mountains. This is where the real climbing lives, and where you spend nights at altitude. Platres is a common base, and from there the routes fan out across high mountain roads with dramatic views. On a clear April day, you can see across much of the island.

    The latter part of the route descends westward toward Paphos — a different character from Larnaca, with a harbour, a castle, and layers of history. By the time you arrive, you’ve crossed the island and descended from mountain altitude to sea level. The sense of accomplishment is earned.

    What You’ll Actually See

    The landscape of Cyprus is not lush. It’s Mediterranean — sparsely vegetated, sun-exposed, and shaped by millennia of human use. You’ll see olive groves, carob trees, pine forests in the mountains, and scrubland in the drier areas. The light is relentless, and shadows are sharp. From high passes, you can trace the road far ahead and understand the topography in a way that’s less possible in more heavily vegetated landscapes.

    Spring brings wildflowers — pockets of significant bloom along roadside verges and in open areas. Villages built in classic Mediterranean style — stone buildings, old monasteries, churches with distinctive domes. Cyprus has been continuously inhabited and fought over; you see this history in the architecture.

    Eight days in warm light, climbing mountains, and ending in a Mediterranean harbour. After a long northern winter, that has a pull that’s hard to explain away.

    Fitness

    Fitness and Pacing on Trans Cyprus

    Trans Cyprus is not a flat tour. You’re climbing consistently, and you’ll gain significant elevation across the eight days. However, the pacing is designed to be achievable for experienced amateur cyclists who have done some serious riding but aren’t racing professionally.

    Typical daily distances range from 30–60 kilometres, depending on elevation and terrain. Some days are shorter mileage but steeper; others are longer but with less climbing. This variation is intentional — it means you’re not doing the same thing every day.

    Fitness benchmark

    If you can comfortably ride 100 kilometres with 1,500 metres of elevation in a day, Trans Cyprus will feel hard but manageable. Total cumulative climbing across the week runs to 10,000–15,000 metres depending on routing. Six to eight weeks of consistent training — longer rides, some hill efforts — from your current base is the right preparation window.

    One advantage of the fully serviced model is that you can ride at a sustainable pace. You don’t need to husband energy for navigating, setup, and camp chores. You ride, arrive at a hotel, and have support staff dealing with logistics. It takes mental and physical load off the day, which lets you be more present with the riding and the landscape.

    Acclimatisation and Altitude

    Cyprus’s highest point is just under 2,000 metres — not high enough to cause significant altitude sickness. However, you will feel the effects of elevation if you’re coming directly from sea level. The pacing of Trans Cyprus helps — you’re climbing gradually over several days rather than jumping to 1,500 metres from the start. What you’ll notice is that effort feels different at altitude. A climb that would be moderate at sea level requires more breathing at 1,200 metres. By day three or four, you’ll have adjusted.

    Logistics

    Travel Logistics: Getting There and Getting Ready

    Getting to Cyprus is straightforward. Copenhagen has direct or single-connection flights to Larnaca, typically taking 5–6 hours of flight time. You can leave Copenhagen in the morning and be on the island by evening. Bringing your bike is standard practice — most airlines accept bikes as luggage if they’re properly packed or brought in a dedicated case.

    The advantage of a fully serviced tour is that logistics are handled. You arrive, your bike is checked and adjusted if needed, accommodation is arranged, and support is in place. You don’t need to navigate finding hotels, book restaurants, or work out daily logistics.

    Practical preparation

    Fresh brake pads. Clean drivetrain. Tyres with good tread — 40–50mm at the right pressure for mixed surfaces. Cyprus uses the Euro; EU roaming applies. English is widely spoken, particularly in tourism. Tap water is safe but heavily chlorinated — most riders prefer bottled. Dehydration is real in the April sun: drink consistently, even when you don’t feel thirsty.

    Cyprus uses the Euro, and the island is part of the EU, which simplifies payment and communication. Food is Mediterranean and straightforward: bread, cheese, vegetables, local wine, grilled meat and fish. If you have specific dietary needs, mention them when you book.

    The service

    What Fully Serviced Actually Means

    It’s worth understanding what you’re getting with a fully serviced tour from Gravel-Adventure. It’s not a guided tour in the sense of someone dictating your pace or routing. Instead, it means support infrastructure: your luggage is transported each day, accommodation is arranged and paid for, and a support vehicle is available if you need it.

    The support vehicle can help if you have mechanical problems, if you’re not feeling well, or if you simply want a break. Most riders don’t use it regularly, but knowing it’s there is reassuring. Luggage transport means you ride with a small bag — water, some food, maybe a light rain shell, and basic tools. Everything else travels ahead. This is liberating.

    Daily briefings provide maps, suggested routes, and information about what you’ll encounter. You’re not riding blind, but you’re also not locked into a fixed path. The structure is there as support, not as constraint.

    Why it works

    Why Experienced Gravel Cyclists Love Cyprus

    If you’ve ridden seriously for years, you understand that what makes a destination work isn’t novelty alone. It’s the combination of interesting riding, manageable logistics, reasonable weather, and the sense that you’re actually engaging with a place rather than just passing through it.

    Cyprus works on all those levels. The riding is real — you’re climbing, navigating varied surfaces, and using your technical skills. It’s not extreme, but it’s not casual either. The terrain feels authentic; the routes follow infrastructure that made sense historically. And because the island is compact and the riding is paced, you actually see places. You stop, talk to people, experience the landscape in a way that matters.

    Planning

    Planning Your Trip

    Trans Cyprus Gravel, operated by Gravel-Adventure, runs 24 April – 1 May 2027 — the ideal window for Cyprus: spring conditions, long days, moderate temperatures. If you’re considering it, planning ahead makes sense. Places fill, particularly for spring departures, and building your fitness takes time.

    What to bring is worth thinking through. Your bike, and gear that’s functional rather than decorative. A good light layer for mornings and cool evenings. Something water-resistant for potential showers. Shoes that work both on the bike and for evening wandering. The less you pack, the less you manage, and the more you’re present.

    Most importantly, you should arrive ready to ride — not at your absolute peak, but fitness-ready, mechanically prepared, and mentally ready to spend eight days doing what you came to do. That preparation transforms the experience.

    Frequently asked

    Questions about Trans Cyprus Gravel

    For general questions about booking, cancellation, and what’s included across all tours, see the Gravel-Adventure FAQ page.

    What is Trans Cyprus Gravel?
    Trans Cyprus Gravel is a fully supported eight-day gravel cycling journey from Larnaca to Paphos, crossing Cyprus via the Troodos Mountains. The tour covers 300–375 kilometres and is designed for experienced amateur cyclists. It is operated by Gravel-Adventure, an experienced tour operator specialising in serviced gravel cycling holidays in Europe and South Africa.
    When does Trans Cyprus Gravel take place?
    Trans Cyprus Gravel runs 24 April – 1 May 2027. April is the optimal window for gravel cycling in Cyprus: temperatures of 18–25°C, long daylight hours, and spring vegetation from winter rainfall. There is no autumn edition in 2027.
    How fit do I need to be?
    You should be comfortable riding 60–80 kilometres with 1,000–1,500 metres of elevation gain in a day. Total cumulative climbing across the eight days is approximately 10,000–15,000 metres. The tour is built for experienced amateur cyclists with a consistent training base. Building that base over the six to eight weeks before departure makes a significant difference.
    What bike and tyre setup is recommended?
    A gravel bike with 40–50 mm tyres works well. A tubeless setup is recommended. The terrain is a mix of tarmac, consolidated gravel, and limestone tracks — tyre volume makes rougher sections significantly more comfortable. Make sure your drivetrain and brakes are freshly serviced before you leave home.
    Is the tour fully supported — what does that include?
    Yes. Gravel-Adventure’s fully serviced model includes daily luggage transfer between hotels, hotel-to-hotel accommodation, a support vehicle available on route each day, skilled guides, and GPS route files. You ride with a small day bag; everything else travels ahead.
    What does the price include?
    The tour price of €2,830 per person covers seven nights of hotel accommodation, daily luggage transfer, the support vehicle, and experienced guides. Flights and bike transport to Cyprus are not included and should be arranged separately.
    How do I get to Cyprus with my bike?
    The arrival point is Larnaca Airport (LCA). From most major European cities, the journey takes 4–6 hours, typically with one connection. Most airlines accept bicycles as checked luggage when packed in a hard case or padded bike bag — check airline policies before booking.
    How does Trans Cyprus compare to other spring gravel tours?
    Trans Cyprus is the most accessible of Gravel-Adventure’s spring options in terms of climate and logistics. It runs earlier in the season than the Alpine and Pyrenean tours, with no altitude or weather complications. For cyclists who want a Mediterranean spring tour with real climbing and full logistical support, it stands out. Compare it to Tuscany Gravel or the Trans Alp if you’re weighing options.

    Closing Thoughts

    Cyprus has existed in the travel imagination for thousands of years — as a crossroads, as a refuge, as a place of significant history. For the modern gravel cyclist, it offers something equally valuable: interesting terrain, manageable logistics, pleasant weather, and the freedom to spend eight days doing what you love in a landscape that rewards attention.

    The Troodos Mountains aren’t the Alps, and the gravel roads aren’t Scotland’s wild tracks. But they’re real, interesting, and rewarding in their own register. And the experience of crossing the island — from one coast to another, through mountain passes and villages — has a shape and a logic that makes it feel like an accomplishment, not just a week of riding.

    Trans Cyprus Gravel · 2027

    Larnaca to Paphos via the Troodos

    24 Apr — 1 MayDates 2027
    300–375 kmTotal distance
    €2,830From per person

    A fully serviced gravel crossing of Cyprus — hotel to hotel, support vehicle included, skilled guides on the ground. The island is waiting.

    See the tour