What to Pack for a Multi-Day Gravel Tour: A Practical Guide
Packing for a multi-day gravel tour is fundamentally different from packing for a camping trip or a self-supported tour where you carry everything. In a fully serviced setting, your luggage travels ahead in a support vehicle each day. You ride with minimal load, typically a small bag or jersey pockets. This changes everything about what you bring and how you think about gear.
The philosophy is simple: bring what you actually need, not what you think might be useful. Your bike needs to be set up correctly. Your body needs appropriate kit for riding. Your luggage needs to contain what makes your evenings comfortable. Everything else is weight and complication. This guide walks you through what to pack for a multi-day gravel tour, what stays in your luggage versus what you carry, and what genuinely unnecessary items you should leave behind.
The Fundamental Principle: Your Bike is Your Primary Gear
Everything else is secondary. Your bike should arrive at the destination in the condition you’ll ride it. This means it should be mechanically sound, properly fitted, and set up for the terrain you’ll encounter. Too many cyclists focus on packing clothes and lose sight of the fact that bike setup is the most important variable for a multi-day tour.
Before you pack anything else, verify your bike setup. Brakes should modulate smoothly and stop confidently. Drivetrain should shift crisply with no sluggishness or hesitation. Tyres should have appropriate pressure for the terrain—gravel requires lower pressure than road, typically 70–85 psi depending on tyre width and terrain. Chain should be clean and well-lubricated. Cables should be tight with no slack. If anything feels slightly off, have it serviced before you leave. A small mechanical niggle becomes a big problem after 50 kilometres of riding.
Rim tape should be checked to ensure tubeless setup is sealed properly (if you’re running tubeless; many riders still use tubes, which is fine). Brake pads should have enough material to safely last the tour. If you’re at all uncertain, replace them. You don’t want to arrive at a tour with brakes that are marginal.
Bike Transport
Your bike will need to get to the tour start. Most cyclists either fly with their bike in a hard case or soft case, or they ship it ahead. If flying, a dedicated bike case (around €50–150) or a travel bag (€30–80) is standard. TSA rules and airline requirements vary, so check before you book. Most European airlines accept bikes as checked luggage if they’re properly packed.
Basic packing: Remove pedals or fold them in. Turn handlebars parallel to frame. Release some air from tyres (they expand in the pressure changes of altitude). Use padding around the frame to prevent damage. Don’t overthink it—bike cases exist specifically for this. Thousands of bikes fly every week without issues.
What You Carry on the Bike: Minimalism in Practice
On a fully serviced tour, you carry minimal gear on the bike itself. A small bag or backpack (maybe 5–8 litres) is ideal. Some riders use a single jersey with rear pockets. Others use a small frame bag. The point is to keep it light and unobtrusive.
What goes in your on-bike bag: One water bottle (you’ll refill frequently) or a hydration pack. Some riders prefer a 1-litre bottle or a 2-litre hydration bladder—either works. Food (probably 300–400 calories of something easily digestible—a bar, some nuts, maybe a sandwich). A small first aid kit (band-aids, antibiotic ointment, pain relief). A lightweight rain shell or packable jacket. Phone and keys. That’s genuinely it for most days.
Tools and spares: A multi-tool (you’ll use it occasionally), a pump (essential), a spare tube, and a small pack of repair patches. Some riders prefer carrying two spare tubes if they’re particularly cautious. A chain lubricant is useful. That’s enough to handle 95% of mechanical issues without needing help from the support vehicle.
Notice what’s absent: sunscreen, bug spray, a full first aid kit, snacks for every moment, a headlamp, a backup phone charger, a rain jacket for every scenario. These things live in your luggage. You’ll have them at the hotel, and that’s where they’re useful. Your job on the bike is to ride, not to carry every contingency.
The Philosophy of Light Carrying
Carrying minimal weight changes the experience fundamentally. You feel faster. Your knees hurt less. Your hands don’t fatigue from gripping the bars against extra weight. You’re simply riding the bike without the psychological burden of carrying a full load. This is one of the major advantages of a fully serviced tour—it lets you be a better cyclist because you’re not also being a pack mule.
If you’re used to self-supported touring where you carry everything, this will feel shockingly light. The adjustment is mental more than anything else. You know the support vehicle has your gear. You know you can stop in a village and buy food rather than carefully rationing what you’re carrying. You can be present with the riding because you’re not worrying about load.
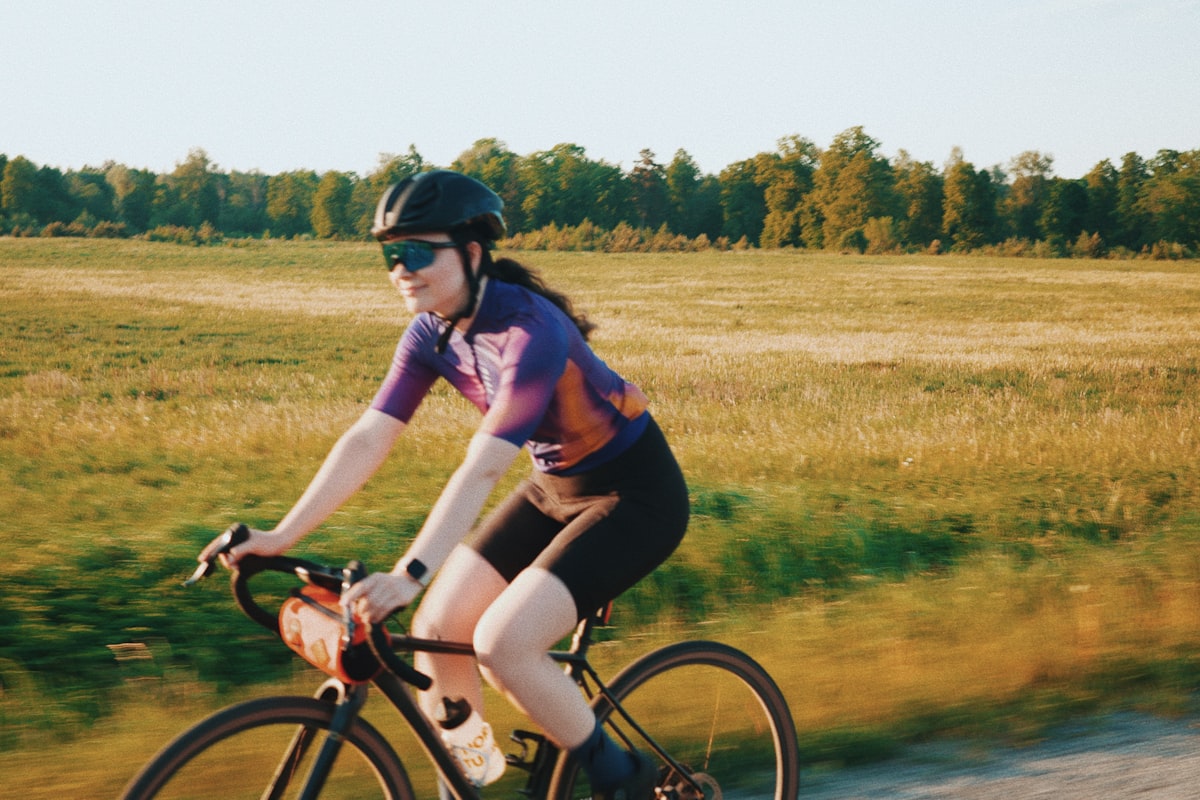
Riding Kit: What You Actually Wear
You’ll be wearing specific pieces of kit for eight consecutive days. Quality and comfort matter more than you might think. Most experienced riders have learned their preferences through years of riding. But if you’re building your kit for the first time, here are principles worth following.
Shorts and Chamois
Good shorts with a quality chamois are essential for comfort on consecutive long days. A marginal chamois feels fine for two hours and miserable after six. You want shorts that stay in place, that don’t chafe, and that have a chamois that supports your sit bones without being bulky. Budget €80–150 for decent shorts. Your body will thank you.
You’ll have multiple pairs in your luggage, rotating through them. Having two or three quality pairs is better than one amazing pair. Chamois cream is useful for preventing irritation; many experienced riders use it as a matter of course on long tours. Bring it in your luggage and use it liberally.
Jerseys and Tops
A quality cycling jersey is better than a t-shirt. It’s cut for forward-leaning posture, has pockets in useful places, and the fabric works with sweat rather than absorbing it. You want something breathable and relatively quick-drying. Bring three jerseys in your luggage—you’ll wear one, have one drying from yesterday, and have a fresh one for tomorrow.
A base layer is useful, particularly for early morning or cool evenings. Something lightweight and merino wool or synthetic (not cotton) is ideal. Cotton holds moisture and creates chafe; synthetic or merino dries faster and feels better against skin. You won’t wear a base layer while riding hard, but for morning rides in cool conditions, it’s valuable.
Layering for Variable Weather
This is crucial for tours in climates where weather is variable. A light, packable insulating layer (merino wool or synthetic fleece) provides warmth without bulk. It packs small and provides real warmth when needed—early mornings, high elevations, or cool evenings. You’ll keep it in your luggage and put it on as needed.
A rain shell is essential. It doesn’t need to be premium or highly technical—any breathable, packable rain jacket works. You’ll keep it in your on-bike bag because weather can change. It’ll get wet and dry on the bike or in your luggage, and that’s fine. A good rain jacket costs €60–120 and will last years.
The principle: dress in layers that you can add or remove without stopping. You’ll start cool, warm up during effort, cool down on descents, and manage with simple adjustments. Overdressing for fear of cold is as problematic as underdressing—you overheat, sweat, then cool down and feel miserable. Experienced riders dress lighter than they think they need to and adjust as they warm up.
Shoes and Socks
Cycling shoes that are broken in are important. New shoes on a multi-day tour are a risk. Your feet swell slightly over the days, and hotspots that were fine fresh become painful. Wear shoes you’ve ridden significant miles in and know are comfortable.
You’ll also want shoes that work for off-bike activities—restaurants, hotels, walking around towns. A pair of sandals or casual shoes in your luggage is practical. Cycling shoes are fine for walking short distances, but for genuine comfort in the evening, having alternate footwear matters.
Socks should be specific cycling socks (not cotton athletic socks or regular socks). Quality cycling socks have merino or synthetic blends that wick moisture, prevent blisters, and provide support. You’ll need four or five pairs in your luggage to rotate through. They compress small and are light enough that there’s no reason not to have enough.
Gloves
Cycling gloves are useful for all-weather riding and for hand protection if you crash. You don’t need fancy gloves—simple padded gloves work fine. Bring one pair that you can wear and wash as needed in your luggage. Most riders keep them on the bike or in their bag.
Evening and Hotel Kit
Once you arrive at the hotel each day, your focus shifts from riding to comfort and recovery. Your luggage contains everything you need for this phase of the day.
Casual Clothes
You’ll want comfortable clothes that aren’t cycling kit. Two or three casual outfits in your luggage—a pair of casual trousers or jeans, a couple of simple tops, something you can wear to dinner or explore the village. This doesn’t need to be fancy. Functionality and comfort matter more than fashion. Most cyclists on tours dress simply and no one cares or notices.
Toiletries and Personal Care
Hotels provide towels, but bring your own small quick-dry towel if you’re particular. Toiletries are personal, but basics worth noting: sunscreen (important in Mediterranean climates, less critical in Scotland but still useful). Lip balm with SPF. Insect repellent if you’re touring in areas with significant bugs. A good moisturiser (sun and wind dry skin). Tooth-related items. Basic medications you know you need.
Chamois cream has already been mentioned, but it’s worth emphasizing: bring it. If you develop any irritation, cream prevents it from becoming a problem. Also useful: blister treatment. If you feel a blister starting, treating it immediately prevents it from becoming severe. A small blister kit lives in your luggage.
Hair and hygiene items are personal. Most hotels provide basic soap and shampoo. If you have strong preferences, bring your own items. The space and weight costs are minimal.
Medication and Supplements
Bring any regular medications you take. Also useful: pain relief (ibuprofen or equivalent), allergy medication if you’re susceptible, and electrolyte supplements if you use them for recovery. Some riders bring magnesium or other recovery supplements. These are personal choices, but space is cheap so bring what supports your health.
If you have conditions (diabetes, allergies, heart conditions), bring relevant medications and medical information. A small note with emergency contact information is prudent for any international travel.
Documents and Practical Items
Your passport or ID is essential (keep it accessible, not buried in luggage). Travel insurance documents should be accessible. A copy of your bike’s serial number is useful for insurance purposes (photograph your bike before you leave). Copies of hotel confirmation emails can be useful if questions arise, though the tour organizer typically has everything sorted.
Phone charger (or appropriate power adapter for the country you’re visiting). At least one backup charger—they’re light and reliable phones are essential. A power bank is useful for extended days away from accommodation.
Any specific documentation the tour requires—emergency contact forms, medical questionnaires. These are typically provided in advance.
Money and Payment
Most tours operate in areas where card payments work reliably, but carrying some cash is prudent. Small villages might only accept cash in shops. Bring enough euros (or relevant currency) for incidentals and tips. Your tour provider will clarify what’s included and what you’ll pay for separately.
What NOT to Bring: The Unnecessary Weight
This might be more important than what to bring. Experienced cyclists learn through painful repetition what they don’t actually need. Some classics worth mentioning.
Multiple pairs of cycling shoes: One pair that’s broken in is sufficient. You’re not replacing shoes mid-tour; you’re wearing one pair.
Multiple jackets: One rain shell works. You don’t need different jackets for different weather patterns. One good shell handles most scenarios.
Backup bike parts: Unless you have a specific concern, you don’t need spare brake pads, spare derailleur cables, or spare spokes. The support vehicle carries basic repair supplies, and mechanical failure is genuinely rare on modern bikes.
Electronic gadgets: You don’t need a camera beyond what your phone provides. You don’t need a secondary GPS device. Your phone is sufficient for navigation, photography, and communication.
Books or reading material: A single paperback or e-reader is fine. Multiple books are weight for minimal gain. Honestly, after riding all day, most cyclists are happy to rest rather than read.
Formal clothing: You don’t need a dress or suit for evening. Casual comfortable clothing is the standard for cycling tours. No one is dressing up; everyone is simply being comfortable.
Full sports equipment: A yoga mat, resistance bands, or other training tools are not necessary. You’re getting plenty of physical activity from riding. Evening recovery is about rest, not more exercise.
Packing Strategy: Luggage Organization
How you organize your luggage matters for daily convenience and recovery. Most fully serviced tours provide guidance on luggage size and type. A single medium rolling suitcase or a large duffel bag is typical. Hard cases are fine but heavier. Soft luggage is more flexible and lighter.
Organization tip: Keep items you need daily (toiletries, medications, casual clothes) easily accessible. Don’t compress everything so tightly that you can’t easily find things. A packing cube or similar compression bag helps organize and saves space.
Your full riding kit and spares (extra jerseys, shorts, socks) should be accessible because they’ll need to dry and be rotated. Don’t pack them so tightly that they stay compressed and damp. Good airflow in luggage helps things dry between uses.
The Day-to-Day Rotation
In practice, your daily routine will be: Wake, put on clean shorts and jersey. Ride all day with minimal gear on the bike. Arrive at hotel, shower, change into casual evening clothes, put riding gear in the sun or in a laundry situation to dry. Sleep. Repeat.
Most hotels will have laundry facilities or will do hand-washing for you. Your riding kit doesn’t need to be pristine—it gets dirty and sweaty and then gets washed. That’s normal. Don’t stress about cycling apparel being perfect; it’s meant to be used and washed repeatedly.
Tips from Experienced Tourers
Packing cubes are your friend. They compress clothing, organize by type, and let you find things without unpacking entirely. Spend €20 on a set and you’ll wonder how you ever traveled without them.
Wear your heaviest/bulkiest items on the plane. If you’re flying with a gravel bike and need luggage space, wear your bulkiest shoes and heaviest jacket on the flight. This saves luggage space and reduces weight on the plane.
Pack last-minute items in a separate bag. Toiletries you use the morning of travel, phone chargers, documents—keep these in a separate small bag that’s easily accessible. Don’t pack them in the main luggage where you’ll need to unpack entirely to access them.
Bring a carabiner or small lock. Not for security in the paranoid sense, but for convenience. You can clip your small bag to your luggage, clip wet gear to something to dry, or secure items. A single carabiner weighs nothing and is surprisingly useful.
Plastic bags are invaluable. Wet gear, dirty laundry, damp shoes—keep them separate from clean items. A few ziplock bags or grocery bags cost nothing and solve real problems.
Bring a small sewing kit. Not a full kit, just needles, thread in a few colours, and maybe a button or two. It weighs nothing and you’ll be surprised how useful it is for minor repairs to clothing or gear.
Pre-Tour Preparation: Testing Your Kit
Before you commit to a specific jersey, shorts, or shoes on tour, wear them for significant rides and verify they work. A jersey that feels fine for 20 kilometres might chafe after 80 kilometres. Shorts that are comfortable for a weekend ride might be problematic after three consecutive days. You want to know these things in advance, not discover them on day three of an eight-day tour.
If you’re buying new kit specifically for the tour, allow time for break-in and testing. Shoes in particular need real miles, not just wearing around the house. Most experienced cyclists say shoes need 50+ miles to truly settle before you commit them to serious touring.
The Weight Question: Why It Matters
You might wonder why so much emphasis on minimal weight when you’re not carrying it on the bike. The reason is psychological and practical. Packing minimally forces you to think about what actually matters. It prevents overpacking, which leads to luggage that’s cumbersome to move, to clothes you never wear, and to a general sense of excess. Minimalism in packing creates space for the actual experience of touring—the riding, the places, the people—rather than managing possessions.
Additionally, minimal luggage means less to keep track of, less to worry about, and less cognitive load. You arrive at hotels, luggage is there, you get what you need, and move on. You don’t spend mental energy on items or logistics.
Closing Thoughts: Let Experience Guide You
These are general principles, but individual preferences vary. Some riders care more about comfort items than others. Some travel heavier, others lighter. You’ll develop your own preferences through experience. Your first tour might involve overpacking; by your second or third, you’ll know exactly what you need and what you can leave home.
The core principle holds regardless: bring what you need for good riding and comfortable recovery. Leave the rest behind. Your bike should be your primary concern—everything else is support. Get those priorities right, and multi-day gravel tours become the remarkable experiences they’re meant to be.